How to Paint Wall Trim and Molding
You know when you are doing interior painting, painting things in the right order can save you time and give you more professional results. For example, you want to paint the edges of the wall before you pain the wall itself. Now up here, where the wall meets the ceiling, this is a great tool to use. It’s a painting pad with some guide wheels right here that will roll along the ceiling, very simple to use, just place it on the wall and pull it along. Next, paint your wood work, like your baseboards and your trim, that’s right, paint this before you paint the wall, and you don’t have to worry if you get some of this trim paint on the wall itself. Now, paint rollers throw off tiny specks of paint when you use them, so you’ll want to protect this newly painted baseboard down here before we start rolling. You can do that with some painter’s tape or masking tape, the idea is just to put the tape on the very top of the baseboard like this so that it acts as sort of a shield. That way the paint specks will fall on the tape and not on the baseboard. Now once the trim paint has dried, we’ll cut the wall color in to meet it, again using a paint pad with these guide wheels. There is no faster way to paint those inside corners than with this corner-painting pad. Finally, roll out the walls, the results will be neat, clean and look like they were done by an expert—which of course, they were.
Blog Articles
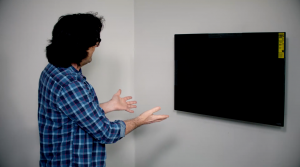
Expert Tips: How to Mount a TV on the Wall
Get step-by-step instructions on how to mount a TV on the wall, especially for big screen TVs. Master the art of wall mounting with our tips.
Frustrated by Stripped Screws? Here’s How to Get Them Out Fast
We've all been there. You're in the middle of a project, and suddenly your screwdriver spins uselessly in the screw head. The screw is stripped, and frustration sets in. With a little know-how and this simple trick, you can tackle a stripped screw and get your project back on track.
The Secret to Finishing Plywood Edges
Plywood projects are fantastic, but exposed edges can be an eyesore. This blog post unveils the magic of edge banding - a simple technique to create flawless, finished edges on your plywood projects, making them look professional and ready for paint or stain. Watch the video to learn how to apply edge banding like a pro!


