RON HAZELTON:
Well, winter's on the wane and spring has almost sprung. Among other things, that means it's time for the national pastime to reemerge and ballparks everywhere to echo with those immortal words, “play ball!” And here at our place, it's never too early to start spring training.
Where's your ball? Okay, here we go. Watch Daddy, see, watch Daddy. See, he's gonna throw the ball up in the air, right like this, he's gonna throw it up in the air and -- uh oh.
CRASHING SOUNDS]
Don't tell Mommy.
LYNN:
Ron, what happened? Oh, my God.
RON HAZELTON:
I'm sorry, I'm sorry. Actually, I was giving Daniel some batting lessons and he had a foul ball down the first baseline and that's the result.
LYNN:
What are we gonna do?
RON HAZELTON:
Well, you know, normally, I'd just take out the pane of glass and replace it, but you've been unhappy with this window for a long time, so maybe we just replace the whole thing. Give you something that's a little more energy efficient, you know, cooler in the summer, warmer in the winter. . .
LYNN:
Your foul ball, I get a new window?
RON HAZELTON:
[LAUGHS] My foul, your home run.
Well, the new windows arrived, and not a bit too soon, I might add. Lynn hasn't been real happy, staring at that piece of cardboard while she does the dishes. So I head out to my van and grab my tool bag, because the first thing I need to do, is remove the window casings on the inside.
A wide putty knife gets things started. Then I bring out my arsenal of prybars to nudge the casing free. Next, I move outside to dispense with that casing. I use a magnet to locate nails that are buried below countless coats of paint. Then I extract them using a nail puller, designed to dig deeply, and grip like a bulldog on a T-bone steak. With most of the larger nails gone, I can pry off the trim with very little hassle.
Well, the window's finally free and I'm working alone today, so as an added precaution, I put a couple of handles on here, so I can keep a good grip on this. So I think it's time to see if we can actually get this out of here.
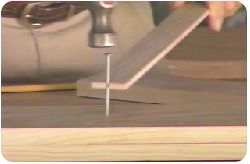
Well, now I have a gaping hole in my kitchen wall; but hopefully, not for long. Before I can put in the new window, though, I need to prepare the opening. That means cutting away the shingles around the edges. The key here is to set the depth of cut on the circular saw just deeply enough to slice through the shingles without cutting into the framing underneath. The opening is just a bit too large for the new window, so I add strips of 3/8" plywood and secure them in place with galvanized nails.
Now, watertight integrity is crucial when installing a replacement window. To make sure this one won't leak, I'm slipping aluminum tape underneath the shingles along the top of the window opening. I'm also applying adhesive-backed metal tape to the bottom.
To make a good seal at the corners, I snip the tape and fold it over onto the face of the framing. One final strip along the back edge, and I pronounce this opening properly prepared.
[MUSIC]
Well, our rough opening is the correct size, and sealed against moisture. Now, what I have to make sure is that this bottom sill down here is perfectly flat and level. Level up here. Okay. So what I've got is a little bit of a low spot here, and one over here, which means there's a small crown in the center.
So I'm gonna put some shims on to level this up and make it perfectly flat. I'm making the shims out of pieces of plywood and sheet metal. Once they're in position, I tack them in place. This time, I lay the level on top of the shims and make a final check.
Well, here's my new window. It’s one from Pella's Architect series. It looks a lot like the window that we took out and that's exactly what I wanted. Something that had a real classic look to it, but is completely up to date when it comes to energy efficiency.
Now, this window is going to just sit in that opening that we've created right there, and it will be held in place with this nailing flange, which I have to bend out to 90 degrees, that is, perpendicular to the top, sides and bottom.
Now, putting in a window like this, is definitely a two-person job. So I've called my friend Rick over to lend me a hand. With the window resting on the shims I've just installed, I drive in two nails through the flange. Then go inside, to check for plumb and level. To keep everything from shifting, I slip shims between the window frame and the inside of the opening. Then, it's back outside to drive in the rest of the nails holding the flange to the framing.
Next, I apply more of the adhesive-backed metal tape on top of the nailing flanges, covering the nail heads. In order to match the rest of my window exteriors, I've made my own sill by cutting it out on the table saw. Notice the top edge has a slope to carry water away from the window.
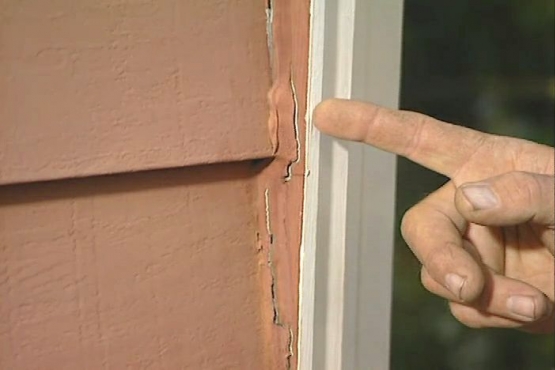
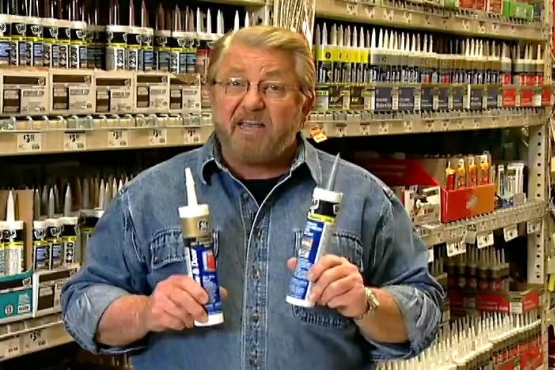
A simple piece of wood trim with a drip cap attached sits in the space between the top of the window and the edge of the shingles I've cut back. I also install wood trim over the foil tape along the sides of the window. Caulking is the final step out here.
Okay, well, except for a little paint, that finishes up things here on the outside. Now I'm going to move indoors and start the trim. The first thing I do inside is pack the space around the edge of the window frame with fiberglass insulation.
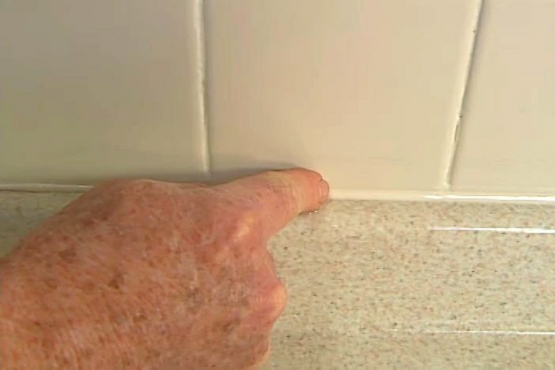
I've also made up the interior sill myself, from a piece of clear pine. A little glue on the edge and a few shots from the nail gun, and it looks like it's forever been part of the window. Next, I head out to the truck to grab the pre-primed window casing.
To put it up, all I need to do is cut miters on the ends and nail it in place. First, the top, then the sides. Installing the hardware is the final step.
Okay, honey, I'm finished.
LYNN:
I don't think so. Why is the copper still there?
RON HAZELTON:
Well, you got so used to looking at that, I thought maybe you'd miss it if I took it away huh?
LYNN:
No. I don't think so, honey.
RON HAZELTON:
This is my idea of humor. Kind of funny.
[BOTH SPEAK AT ONCE]
LYNN:
Oh yes, that's funny.
RON HAZELTON:
You know, this window hasn't changed in its appearance a whole lot, which is good for me, 'cause I like the way it looked, but it's a much, much better window. Metal clad on the outside, gonna keep the maintenance down low, I like that.
Dual pane glass, cool in the summer, warm in the winter. It's got a low e-coating on the glass, to reduce fading. And this is a feature I just love. You know, we like to open these windows and we can pull the screens right down.
LYNN:
Wow.
RON HAZELTON:
They're built into the window. And then when you don't want them --
[BOTH SPEAK AT ONCE]
LYNN:
That's great, that's great.
RON HAZELTON:
-- they just go up the side. They're right there.
LYNN:
Great, really great.
RON HAZELTON:
So you've got everything you need, right?
LYNN:
Yeah, great, great new windows. Good work, good work.
[BOTH SPEAK AT ONCE]
RON HAZELTON:
All right, so you're -- you're -- speaking of work, you're all set, aren't you? That's all you're gonna need. I, on the other hand, have got a little more spring training to do with Danielle.
LYNN:
I don't think so, Ron.