RON HAZELTON:
Well, today I'm headed to the mile-high city, Denver, Colorado to visit John Gritten. Hey, John.
JOHN GRITTEN:
Ron, hi.
RON HAZELTON:
How you doing?
JOHN GRITTEN:
Welcome to Denver.
[BOTH SPEAK AT ONCE]
RON HAZELTON:
I didn't expect to find you in the garden.
JOHN GRITTEN:
Good.
RON HAZELTON:
So we're going to build a potting bench, huh?
JOHN GRITTEN:
We are. Let's go to the back and take a look.
RON HAZELTON:
All right. Well, listen, I drew up a little sketch here of the potting bench. I want you to take a look at it because you're going to be using this, and it has to work for you. So what I thought — maybe a shelf underneath here.
JOHN GRITTEN:
Very handy.
RON HAZELTON:
And then another set of shelves maybe up here above the bench.
JOHN GRITTEN:
You read my mind, that's exactly what I had in mind.
RON HAZELTON:
Yeah — okay. I want to make up a cutting list for this.
JOHN GRITTEN:
Okay.
RON HAZELTON:
And talk to about what kind of materials we want to use and then let's go ahead and cut some wood.
Using the cutting list as our guide, we cut all the 2 by 2s, 2 by 4s and 1 by 4s to the lengths we'll need, from weather-resistant redwood.
Well, John, we've cut all of our wood here. This is enough wood for the entire bench and let's go back to the drawing for a second, because this is the first thing I want to do here is build one of these braces right here. We actually will construct three of these. They'll be identical. Now when I'm doing three things that are exactly alike, I like to lay them out.
You were kind enough to provide this bench —
[BOTH SPEAK AT ONCE]
JOHN GRITTEN:
It's a great idea.
RON HAZELTON:
— so I've used that. And this shows the position of every piece of wood that will make up this bracket. So let's just grab the wood right now and start — just lay it right on top there, there you go.
JOHN GRITTEN:
The back one.
RON HAZELTON:
Right, this would be your front leg.
[BOTH SPEAK AT ONCE]
The other great advantage to doing this is that it's a good double check that everything has been cut to the right length 'cause if we put something on here and it doesn't fit —
[BOTH SPEAK AT ONCE]
JOHN GRITTEN:
Fit — that's wrong —
[BOTH SPEAK AT ONCE]
RON HAZELTON:
— then we go back to the drawing. John, everything's laid out — clamped in place so it won't move around. It's now time to attach these together. I'm going to use a vinyl-coated rust-resistant decking screw today.
These are actually new for me. If you look at the —
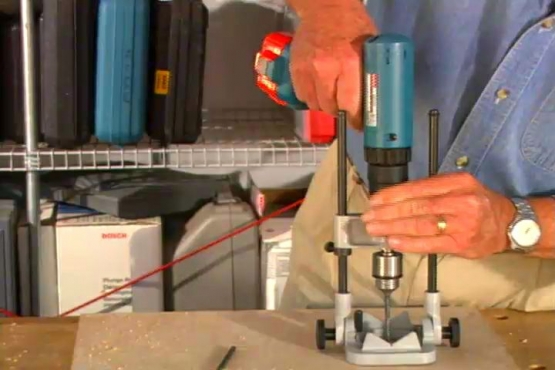
This type of screw accepts either a square drive or Phillips head bit. For this soft wood we're driving into, a Phillips head will work just fine. I first drill pilot holes to prevent the screws from splitting the ends of the boards as they're driven in. After all the boards are securely attached, we flip the frame over and repeat the process.
We're going to — we're just going to match those braces on the other side now.
JOHN GRITTEN:
Okay.
RON HAZELTON:
There you go. I think we'll probably have to do clamping on this. Want to grab those.
JOHN GRITTEN:
It will be easy enough.
RON HAZELTON:
I get one - yeah, there you go. [DRILLING] Well, here are our three frames, left, right and center. John, why don't you put that one over here for just a second.
JOHN GRITTEN:
Yep.
RON HAZELTON:
What I want to do now is begin to put these together.
To hold the end frames upright, I temporarily clamp a brace to each one, then space the frames about six feet apart.
All right, John, if you'd grab that board right there.
JOHN GRITTEN:
All right.
RON HAZELTON:
That's going to be the front edge here. And there's a small clamp up there on the — can you reach that?
JOHN GRITTEN:
Yeah, I can.
RON HAZELTON:
Once the front edge is in place, we clamp it to the frames.
Now we really don't need this bottom brace any more, so we're going to take this off. That will allow us to actually adjust this top joint. Okay, let's start screwing this together.
JOHN GRITTEN:
All right.
RON HAZELTON:
I'll do the pilot holes if you will put in the rust-resistant screws.
[BOTH SPEAK AT ONCE]
JOHN GRITTEN:
I am ready. I'll follow right behind you.
RON HAZELTON:
We add the center frame by first clamping it to the front edge and then fastening it with screws. The rear edge is attached next. Our potting bench is finally beginning to take shape.
Now, just put the bottom edge at the top of the double there, John. Okay, and let it come to me a little bit. A little bit more. Okay, right there. Good. John, I'm just going to-
After framing the top shelves, we move to the bottom levels —
— space or margins between each one.
[BOTH SPEAK AT ONCE]
JOHN GRITTEN:
The distance between each one?
RON HAZELTON:
Yeah, there you go. We'll just eyeball this. We don't have to rip anything down. Here we go. All right, John, moving on to the top —
[BOTH SPEAK AT ONCE]
JOHN GRITTEN:
— right along.
RON HAZELTON:
Now let's just lay these out first and we can kind of get our spacing straight here. Now these — we're going to overhang on the sides just a little bit. So let's start with the front board here.
JOHN GRITTEN:
Okay.
RON HAZELTON:
And let's overhang it maybe a quarter of an inch.
JOHN GRITTEN:
On the front?
RON HAZELTON:
Yeah.
We first clamp the front board into position and then attach it and the remaining boards with screws. This work surface will be the ideal place for planting seedlings, repotting and cultivating container plants.
Next, we assemble the upper shelves — handy, easy-to-reach storage for pots, tools and supplies.
Well, John, it's all assembled. I did though promise you some place to keep your soil and to put your clippings, your cuttings. So this is just a plastic container we got at the —at the home improvement center. I'm going to use this as a template. If you can kind of give me kind of a rough mark over there. Just align it there.
JOHN GRITTEN:
Okay.
RON HAZELTON:
And I'm going to trace the outside of it.
JOHN GRITTEN:
This is going to be real handy.
RON HAZELTON:
Using a jigsaw, we cut out the opening that we just traced from the container. [JIGSAW SOUNDS] Okay, John, this will hold the edge of this, with this plastic bin, okay. You lined up there?
JOHN GRITTEN:
Excellent.
RON HAZELTON:
Okay, let me put one screw in right here.
JOHN GRITTEN:
And that's going to let it sit down further in there so it will be easier —
RON HAZELTON:
Yeah, exactly.
JOHN GRITTEN:
— to just keep the stuff in it, right.
[BOTH SPEAK AT ONCE]
RON HAZELTON:
It won't be sticking up so far. Okay John, let's drop this in, see how your jigsawing was. Looks good over here.
JOHN GRITTEN:
Yeah. There it is.
RON HAZELTON:
Oh, what a fit.
Well, it didn't take long for John to put his new bench to work. I'd say it's going to suit him just fine.
JOHN GRITTEN:
I love it. I will certainly get a lot of use out of it. I'm extremely pleased to have it, really glad that you guys came and appreciate all that you did to, to help me out here.