RON HAZELTON:
Today I'm answering an SOS from my neighbor Christine, who has given up on her kitchen table because she considers it well, beyond help. I'm going to have a look.
[DOORBELL]
Hey, good morning Christine.
CHRISTINE:
Hey, Ron, good to see you.
RON HAZELTON:
Hey, Oliver, how you doing buddy? So this is the table -
[BOTH SPEAK AT ONCE]
CHRISTINE:
This is it.
RON HAZELTON:
Oh, wow. This is the table that gets all the use, right?
CHRISTINE:
You bet, yeah.
RON HAZELTON:
Constantly, yeah. You know, what I think happened here is I think the original finish on here was on the thin side. And what's happened with all the cleaning and just time and plates being dragged across this, that finish has just plain worn off.
In fact, it's worn so much that even the color underneath the stain is gone in some places. So you're -- we're looking pretty much at bare wood right now. So what I want to do is, kind of take this back to how it looked when it was new.
CHRISTINE:
That would be great.
RON HAZELTON:
But the finish I'm going to put on here is going to be a lot tougher. It's going to hold up to the kind of use a kitchen table gets, all right.
CHRISTINE:
That's what we need.
RON HAZELTON:
Now this job is one I prefer to do in my shop. So I'm taking the top of the table back with me.
[MUSIC]
Now the first thing I'm going to want to do is remove what's left of this finish on here and I'll be using a paint stripper. This is a thick paste brushable type.
Okay, now I'm going to be applying this to the tabletop with a fairly wide, natural bristle disposable brush. Now the whole idea when I'm working with stripper here is I don't want to over brush it. I want just enough to spread this out, because the chemicals in the stripper that do the work, are gases.
And the more I brush this, the more they escape into the air, the less are left behind to do their job, which is to loosen the paint up. So just enough brushing to lay it on the surface like this.
Now the whole idea with stripper is to let the chemical do the work, so I want to give this just a few minutes. And if you look at the surface here, you'll begin to see that the finish is actually bubbling up. It's lifting itself from the wood underneath and that's what we want to be looking for.
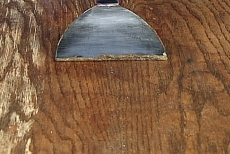
Now to lift that old finish off the surface, I'm going to use a wide putty knife. I'm going to make one modification to this tool first though and that is, I want to round off the corners here so that they wouldn't dig into the surface.
By holding the putty knife at a shallow angle and applying moderate pressure as I move across the surface, I can remove nearly all the old finish in one pass. A small box makes a good receptacle and gives me an easy way to clean my putty knife. I'm applying the stripper to smaller sections at a time to prevent it from drying out and allowing the finish to become hard again.
[MUSIC]
Now I've opened the shop doors and have plenty of cross ventilation while I use these chemicals.
[MUSIC]
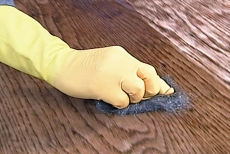
Medium coarse steel wool does a good job of removing the old finish from the rounded table edge.
Now that paste stripper took off most of the finish. There's a little bit of residue here though, so I'm going to go over it a second time, only this time I'm going to be using a liquid stripper. I apply the liquid stripper liberally with a brush.
It flows into the wood grain loosening the old finish there and softens anything left behind by the paste. Medium fine steel wool helps dislodge any stubborn remnants and lift them from the surface. To prevent scratches, it's important to make long straight passes in the direction of the wood grain.
Well, I'd say all of that finish is off but I am going to go one more step here. I don't always do this, but most of the time I like to. These strippers have waxes in them and this last step is a wash with lacquer thinner and the idea here is to wash off any of that wax that's been left behind.
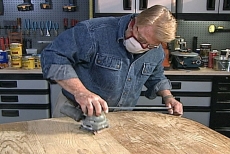
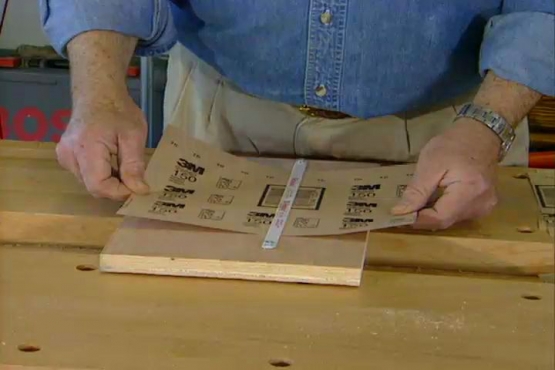
Again, I brush on the lacquer thinner, then use fine steel wool for this final cleaning. Now it's time for a little sanding and I do mean little. This tabletop is oak veneer, probably only a 16th of an inch thick, or less.
I'm using a finishing sander with 220 grit sandpaper.
[MUSIC]
Well, the table is stripped, sanded and cleaned. Now it's time to put some color back, or stain it. Now remember, I'm only doing the top of this table, so I've got to get this color to be a pretty close match to the base.
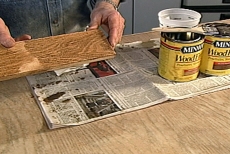
What I've done is taken a couple of colors here, Special Walnut and Ipswich Pine and I've put samples of each on this board right here. Well, let's see how this looks. I'd say the Special Walnut right here is a little bit dark and the Ipswich Pine might be just a shade light, but I bet if I inter-mix these two, I'd get pretty close.
The Special Walnut will be my base color. To lighten it just a bit, I'm using a baby syringe to add a small amount of the pine stain. Now you can apply stain with a rag or a brush. I kind of prefer a brush. I like to put it on fairly wet and then wipe it off with a cloth or a paper towel.
[MUSIC]
Here too, I work in the same direction as the grain, wiping in long, even, straight strokes. Well, the color’s restored. I'm going to let this dry now for at least 24 hours and then I'll come back and put a clear top coat on.
You know, in just about any refinishing or painting job, preparation is the most important part of the project and I think we've done a pretty good job of preparing this here. It looks fantastic. Now I'm about ready to start putting on the -- the clear top coating.
This is polyurethane. And you notice that I'm stirring it here. You may wonder well, why is he stirring it, it's a clear material? Well, this is actually a semi-gloss polyurethane and the reason I'm stirring it is that the flattening agent can settle to the bottom of the can.
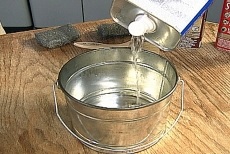
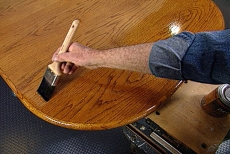
So what I want to do is pick it up and redistribute it throughout the liquid here. I give the table a final dusting to remove anything that might have settled onto the surface. Now this is an oil based material, so I'm going to be using a natural bristle brush, and you know, I don't skimp on my brushes on a job like this. I want to make sure that I'm using the best brush I can find for a couple of reasons. It's going to lay a much smoother finish and the likelihood of me dropping bristles out leaving them in the coating, is going to be very small.
Rather than work directly from the can, I like to pour the finish into a clean container. Then load the brush by dipping it in and gently slapping it on the sides to remove any excess material. I'm using a satin, polyurethane that will enhance the wood grain, give a soft sheen and most importantly, provide a tough, durable surface that will stand up to spilled liquids and scuffing.
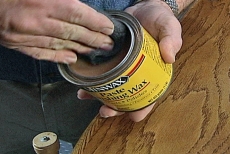
In this case, I'll apply three coats and sand lightly in between. The final coat is thoroughly dry and I'm now applying paste finishing wax with a pad of 4-O steel wool. Now doing this eliminates any minor surface imperfections and gives the tabletop a smooth, almost velvety feel. I let the wax dry for a few minutes, then buff it with a soft cloth.
[MUSIC]
Well, it's time to put this piece of furniture back into service.
Ready, one, two, three.
CHRISTINE:
Wow [LAUGHS]. It's like a new table.
RON HAZELTON:
Turned out nice, didn't it?
CHRISTINE:
It's gorgeous.
RON HAZELTON:
Now it, it actually is, is in a way, better than a new table because the finish that I've put on here is really tough, okay.
CHRISTINE:
It has to be. Okay, nobody can eat on this.
RON HAZELTON:
Like it? No, no, no -- I want to show you something, okay? I've got three coats of polyurethane on here. It will take just about anything. And so to demonstrate, watch this.
CHRISTINE:
Watch, Oliver. Wow.
RON HAZELTON:
You see how that water beads completely up on the surface. So any kind of spill like that, you just take a cloth --
CHRISTINE:
Watch.
RON HAZELTON:
And wipe it up. I put a coat of wax on here. Maybe like twice a year, I'll give you some --you know, put a little more wax on it.
CHRISTINE:
Okay.
RON HAZELTON:
And that's really all you're going to have to do to care for this. It's really -- so use it – what I’m saying is it looks nice, it's pretty, but use it.
[BOTH SPEAK AT ONCE]
CHRISTINE:
Well, you can’t have milk without brownies, made these fresh for you this morning.
RON HAZELTON:
Oooeee, hey, you know, what?
CHRISTINE:
Thank you for my new table.
RON HAZELTON:
You're very welcome. I'll do a table any time for fresh brownies.
CHRISTINE:
That's a deal.
RON HAZELTON:
You have one?
CHRISTINE:
That's a deal.
RON HAZELTON:
Oh --
CHRISTINE:
Oh --
RON HAZELTON:
Oh, you know, but from now on, you won't have to cry over spilled milk.
Sometimes we can really be surprised at the beauty that's lying just beneath the surface. That's certainly the case here.
 For more information on the Minwax products used in this video, click here.