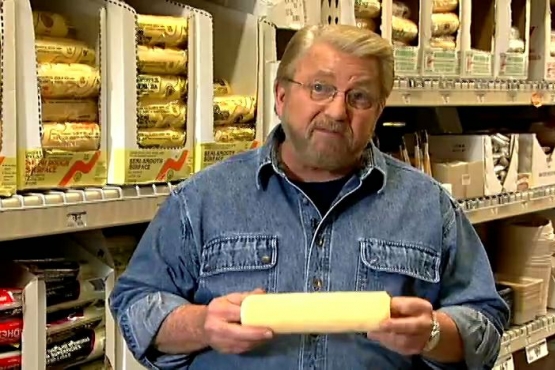
RON HAZELTON:
Well, I’m headed across town, right here in Fairfield, Connecticut to visit Ira and Audrie Wise.
[MUSIC]
IRA WISE:
Our son Harper's room is like wall-to-wall stuffed animals.
AUDRIE WISE:
What I would like to do is give him a place so that we don't have to have piles of stuff everywhere. It drives me insane.
RON HAZELTON:
No question about it, what's needed is a zoo on the wall, so I'm headed over to their place.
AUDRIE WISE:
Hi.
RON HAZELTON:
Hey Audrie, Ira.
IRA WISE:
Hey, Ron.
RON HAZELTON:
How you guys doing?
IRA WISE:
We're great, thanks for coming.
[BOTH SPEAK AT ONCE]
AUDRIE WISE:
Very well.
RON HAZELTON:
So you've got a toy storage crisis, huh?
AUDRIE WISE:
We have a big problem.
IRA WISE:
It's a big toy story.
RON HAZELTON:
Why don't you guys — should we go take a look at the space?
AUDRIE WISE:
Absolutely.
[BOTH SPEAK AT ONCE]
IRA WISE:
Sure, come on upstairs.
RON HAZELTON:
So, so this is Harper's room.
IRA WISE:
Yeah.
AUDRIE WISE:
Yeah.
RON HAZELTON:
I can't help but notice there's quite a collection of stuffed animals here. In fact, I'm wondering now at night, when he goes to bed, what happens to all the stuffed animals?
IRA WISE:
Well, either he gets buried or they go on the floor.
[RON LAUGHS]
AUDRIE WISE:
Nothing happens. He accommodates them, right.
[BOTH SPEAK AT ONCE]
RON HAZELTON:
[LAUGHS] He shares the bed. So what were you thinking here? I mean you want to just create some storage for — mostly for the stuffed animals?
HARPER:
Yeah.
IRA WISE:
Well, yeah, we want — yeah, yeah.
RON HAZELTON:
Yeah?
[AUDRIE LAUGHS]
We want a place for the, for the stuffed animals to go off the floor. We'd also like this bookshelf here behind you — we'd like to get that off the floor as well.
RON HAZELTON:
Okay. So then the thought is to try to use the walls for storage.
AUDRIE WISE:
Absolutely, and to get all this stuff off of the countertops.
RON HAZELTON:
So Ira and I head back to my shop to draw up some plans.
Ira, pull up a seat. Now this is some easy-to-use design software called Sketcher, I think we can have some fun with. Here, let me open this up. So I thought what we'd do first of all is, we'd create Harper's room here.
IRA WISE:
Wow.
RON HAZELTON:
Does this look about right? I mean this is, this is his bed.
IRA WISE:
Yeah, his bed, his dresser, his other dresser, that's the radiator, his bookshelf that's already there.
RON HAZELTON:
So now what we can do is just sort of play around with this because we want to take a shelf — and I, and I'm seeing these as maybe kind of free-floating shelves. So what do you think? Something like that?
IRA WISE:
That will work. Wow, that would get all the stuffed animals off the bed, toys out of the toy box, the books off the shelf.
RON HAZELTON:
So these are going to be hollow shelves that are attached to a cleat that mounts to the wall. Want to make 'em up?
IRA WISE:
Sure.
RON HAZELTON:
Okay, let's start, let's start by cutting up some wood.
[MUSIC] [SAWING SOUNDS]
Can you move around here, Ira.
IRA WISE:
All right.
RON HAZELTON:
Just kind of keep this snug up against the fence there. Okay, nice and easy. Okay, Ira, bring it into 9 and 1/4.
IRA WISE:
All right.
RON HAZELTON:
Okay? [MORE SAWING SOUNDS] Well, Ira, this is poplar. We're going to make the edge out of this.
IRA WISE:
Okay.
RON HAZELTON:
Isn't that beautiful?
IRA WISE:
I love that.
RON HAZELTON:
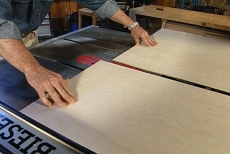
It's one of the few woods that has purple in it. This is actually caused by minerals in the soil that the tree kind of draws in, and it, it kind of colors the wood like this. And we're going to cut this down to strips that are two inches wide, exactly two inches.
Okay, Ira, just roll it right in.
IRA WISE:
All right, 46 and a half.
RON HAZELTON:
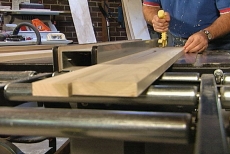
Now Ira's had a bit of woodworking experience, so he goes ahead and cuts the wood to length, while I get ready to start assembling.
You've been busy.
IRA WISE:
Yeah, doing a lot of cutting.
RON HAZELTON:
So you know, what we've sort of got here is a shelf kit, at least enough for a couple shelves right here. The concept behind this shelf is, it's sort of like a hollow core door. A framework, a lightweight framework with a thin skin on the top and the bottom.
So essentially it's a hollow shelf. It's lightweight, but it could be very, very strong when it's built up like this. So this is kind of the, the way it's going to look here. Then there will be a couple braces dropped in here, like so.
Then we're going to apply some of these skins that you cut, to the top and to the bottom.
IRA WISE:
Oh, I get it.
RON HAZELTON:
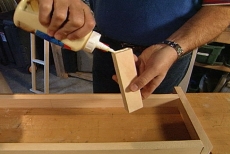
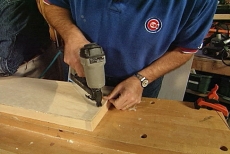
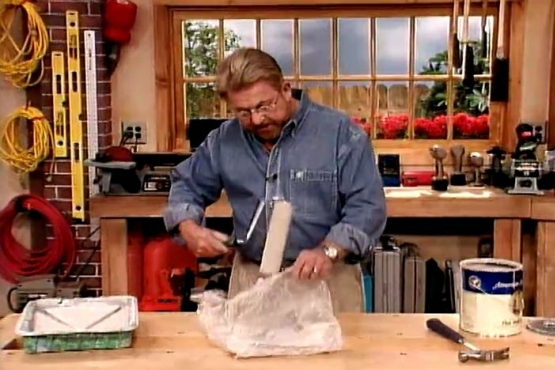
We start by gluing and nailing the frame together, then glue, insert and nail the cross braces.
All right. Moving on.
We're finished assembling the frames, so our next step is to apply glue and set the plywood skins in place.
Drop this right in.
Staples are used to pull the skins into contact with the frame while the glue dries. We finish one side, then flip the shelf over and repeat the process.
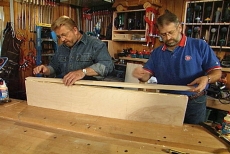
Well, there it is. This is really tough. Let me show you. Believe this — I mean I can talk about this all day but you know, put it to the real test. Have a seat.
IRA WISE:
Have a seat.
RON HAZELTON:
Now we're not exactly skinny guys, are we?
IRA WISE:
Ah, no.
RON HAZELTON:
But it's holding us.
IRA WISE:
All right.
RON HAZELTON:
So no question about the strength on this, right?
IRA WISE:
It will hold.
RON HAZELTON:
Now though, we've got a little appearance problem here because we see the edge of the plywood.
IRA WISE:
Okay.
RON HAZELTON:
So what I want to do now is take some of that popper that you ripped earlier — now you've already cut that —
IRA WISE:
Right.
[BOTH SPEAK AT ONCE]
RON HAZELTON:
— one miter here.
IRA WISE:
You got any beveler or miter, one edge.
RON HAZELTON:
Right. Now just slip that down so that the inside of the miters are right in the corner.
IRA WISE:
Looks good.
RON HAZELTON:
All right. Now I'm going to come in and just draw a line right here. And then what I need you to do is just cut another miter back in that direction.
IRA WISE:
Okay, I got the other end done.
RON HAZELTON:
Excellent.
IRA WISE:
Okay.
RON HAZELTON:
Just pop that right on there and what I like to do on this, just kind of slide it back and forth a little bit to spread the glue around a little bit. How you looking down there?
IRA WISE:
It looks good.
RON HAZELTON:
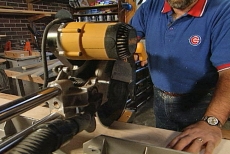
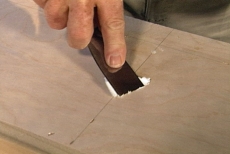
Once the front trim is attached, we glue and nail the end pieces. Finally, we fill the staple holes with spackle and sand everything smooth to the touch. [SANDING NOISE]
Nice, nice.
IRA WISE:
Thank you.
RON HAZELTON:
So this is the concept here. This is the batten that will go up on your walls.
IRA WISE:
Okay.
RON HAZELTON:
And you see that hollow bay in the back here.
IRA WISE:
Sure.
RON HAZELTON:
The shelf will slip right over that. And that's what's going to hold it up in place. So why don't you run that one up and I'll grab the next one.
IRA WISE:
Okay, all right.
[MUSIC]
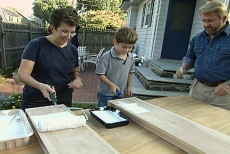
Shall we paint?
IRA WISE:
We should paint but I need a lot of help. I need —
[BOTH SPEAK AT ONCE]
RON HAZELTON:
You have not rolled before?
IRA WISE:
I don't believe so, no.
RON HAZELTON:
Okay. Very, very simple. Grab the roller.
IRA WISE:
All righty.
RON HAZELTON:
Harper, have you got your roller?
HARPER:
Mm-hmm [AFFIRMATIVE].
RON HAZELTON:
Okay, put your roller in the paint. Go ahead and kind of roll it back and forth. All right, you ready?
HARPER:
Mm-hmm [AFFIRMATIVE].
RON HAZELTON:
Roll away. Oh, you guys are good.
IRA WISE:
All righty. Oh, Harper, you're doing a great job.
[BOTH SPEAK AT ONCE]
What do you think pal?
HARPER:
Fun.
IRA WISE:
We did a good job.
RON HAZELTON:
That's a very good job, Harper. You know what this is called right here?
HARPER:
What?
RON HAZELTON:
That's called a holiday. Do you know why —'cause the painter took a holiday and didn't get quite enough paint on there. Were you on holiday? Just roll back over that and make it all, make it all white, nice and white. Okay, there you go. Oh, attaboy.
IRA WISE:
Hey, Harper, check it out, we finished at the same time.
HARPER:
Cool.
RON HAZELTON:
And I pronounce —
IRA WISE:
Ta-da.
RON HAZELTON:
Got a tie. Hey.
[RON AND AUDRIE CHEERING LOUDLY]
To help Audrie visualize where on the wall the shelves should go, I suggest she use painter's tape to experiment with different positions. Harper's got his opinions too.
HARPER:
Right under it.
IRA WISE:
Right under it? But then we don't want it to hit the lamp, right? What do you think?
HARPER:
A little bit down.
IRA WISE:
[LAUGHS] A little bit down. Well, let's check it out. So we'll put books on there and maybe some toys you don't need too often up there.
RON HAZELTON:
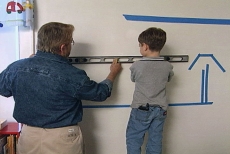
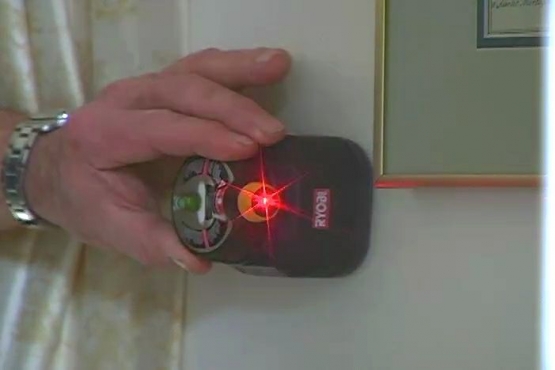
Once the shelf locations are settled, the tape is removed and Harper and I draw in some level lines.
I want you to hold the end of this. It's a little heavy. Are you strong?
HARPER:
Yeah.
RON HAZELTON:
Okay, hold it up, I'm going to put this on the mark like that and I'm going to — you see, you see those bubbles, see your bubble here, right there?
HARPER:
Yeah.
RON HAZELTON:
You let me know when that bubble's right in between the two, the two lines, okay? Just say, now.
HARPER:
Now.
RON HAZELTON:
Now? Okay, that means this is level, okay. So I'm going to draw a line across here.
Now it's time for mom and I to attach the mounting strips.
Now we're going to screw that to the wall. We've drilled a hole here every place there's a wall stud. So if you can hold that up, I'm going to put the first screw in right here, and then we can kind of adjust that board as we go. And here we go. [DRILLS] I'm going to have you run the next two screws in.
HARPER:
Like that?
RON HAZELTON:
Mm-hmm [AFFIRMATIVE]. Beautiful. It doesn't get any better than that.
IRA WISE:
Very cool.
RON HAZELTON:
Yeah?
IRA WISE:
I'm delighted.
[MUSIC]
RON HAZELTON:
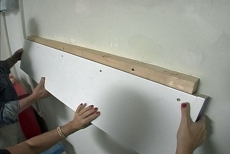
One final decorative touch to the edges and we're ready to start putting the shelves up.
Right up here.
IRA WISE:
Okay.
RON HAZELTON:
And it slips over the — that we put —
[MUSIC]
[IN FALSETTO] Hi, Harper. Well, what do you think of your new room? Come on in, come on in, take a look around at your room. What do you think huh?
[BOTH SPEAK AT ONCE]
HARPER:
Wow, that's really, really cool.
AUDRIE WISE:
What do you think, sweetheart?
HARPER:
It's really cool.
RON HAZELTON:
Do you love it?
AUDRIE WISE:
Do you love it?
HARPER:
Yeah.
AUDRIE WISE:
The clutter is gone. Yay —
RON HAZELTON:
[FALSETTO] I just want to say that it was a real pleasure working with you. And you did a really good job of putting those lines up there and getting everything level.
AUDRIE WISE:
What do you want to say to Ron?
HARPER:
Thanks.
RON HAZELTON:
You're very welcome.
HARPER:
Looks really, really good.
RON HAZELTON:
You're very welcome. Dad, if, you know, the collection gets larger, you've done it, you can put 'em on a few of the other walls in here.
IRA WISE:
Yeah, well, see mom's going to do the — putting it on the wall. I can, I can build 'em, but she can hang 'em.
RON HAZELTON:
And what a team.
AUDRIE WISE:
It's great. We could do it.
RON HAZELTON:
There you go.
AUDRIE WISE:
We could actually do it.