How to Convert Your Garage into a Workshop
Convert Your Garage into the Ideal DIY Workshop with a Place for Everything and Everything in Its Place
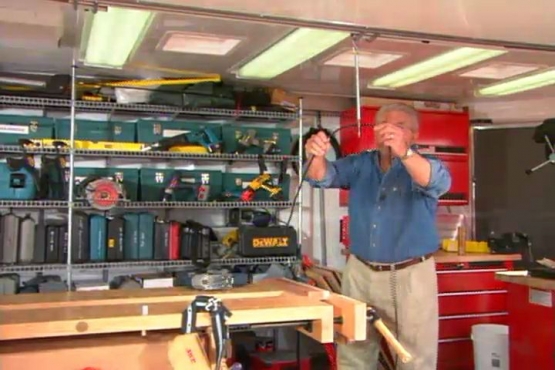
Turn a garage into a functional and good-looking DIY workshop by first clearing the garage completely. Like a clean canvas, an empty garage lets you plan what you need rather than planning around the clutter. Lay out cabinets, counters, shelves, drawers, pegboards and bins for a workshop with a place for everything and then put everything in its place.
Transforming your garage into a DIY workshop can be a game-changer for your home improvement projects and hobbies. By following the steps outlined below, you can get the most out of your space, tailored to your specific needs. With a well-equipped workshop at your disposal, you'll have the freedom to explore new skills, complete projects with confidence, and enjoy the satisfaction of creating something with your own hands.
Read More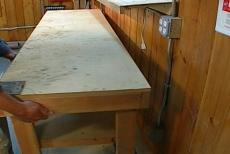
Remove Existing Tools and Materials from the Garage
Clear everything from the garage, sorting items to be discarded from those to keep. An empty garage lets you plan what you really need rather than adapting to the clutter. Have a yard sale with the discards and recycle properly.
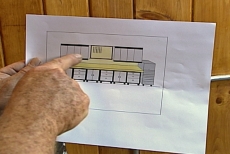
Sketch a Layout for the First Garage Workshop Wall
Plan one wall with base cabinets with doors and drawers, a heavy wooden countertop, space for a tool board and wall cabinets with doors. Storage in drawers and behind doors helps to hide objects that make a workshop appear disorganized.
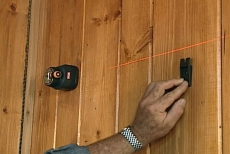
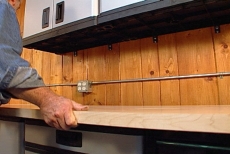
Mount Wall Cabinets with Special Clips and a Laser Level
Use strong, lightweight wall cabinets designed for basements, garages and workshop storage. Sight a laser level at the correct elevation and attach special cabinet clips, securing them with screws driven through the cabinets and walls into the studs behind.
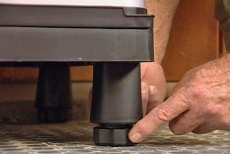
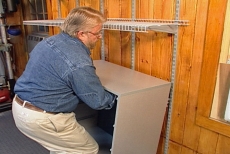
Position and Level Base Cabinets According to the Layout
Roll the base cabinets for the garage workshop into position along the first wall. Ensure their surfaces are level and even by adjusting the levelers on the bottom of each leg. The countertop requires a uniform surface across the cabinets.
Set a Heavy Hardwood Countertop over the Base Cabinets
Use 1 1/2-inch thick solid hardwood for the counter top. If it is heavy enough and does not overhang the cabinets, it may not need to be secured.

Plan the Second Wall shelves, Bins, and Pegboards
Layout storage areas on the second wall with shelves and plastic bins for small parts and materials, pegboard and base cabinets. This system comes with a pre-finished counter that rests on top.

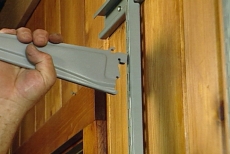
Level and Mount the Rail for the Hanging Shelves
Draw a level pencil line near the top of the wall. Drive a temporary finishing nail into the wall to support one end of the cumbersome rail while you use a power drive to secure the other end with a screw.
Attach Shelf Standards and Supports to the Mounted Rail
Use a shelving system that hangs from this rail, hooking the vertical standards over the bottom edge of the rail and inserting the shelf supports that lock into position. Add shelves that snap into the supports and secure with screws.
Position and Hang Cabinets on the Standards
Insert the grips on the back of the hanging cabinets into the standards in the same way as the shelf supports. These cabinets are suspended above the floor to avoid obstacles such as the concrete footing in this garage workshop.
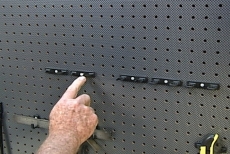
Mount One-by-two Strips for Pegboard
Add one-by-two strips and mount pegboard with drywall screws that blend invisibly on its titanium/carbon fiber-like finish. Insert plastic tool holders in a variety of convenient configurations and push the plastic screw heads to lock them in place.
Related Tips
Blog Articles

Expert Tips: How to Mount a TV on the Wall
Get step-by-step instructions on how to mount a TV on the wall, especially for big screen TVs. Master the art of wall mounting with our tips.

Frustrated by Stripped Screws? Here’s How to Get Them Out Fast
We've all been there. You're in the middle of a project, and suddenly your screwdriver spins uselessly in the screw head. The screw is stripped, and frustration sets in. With a little know-how and this simple trick, you can tackle a stripped screw and get your project back on track.

The Secret to Finishing Plywood Edges
Plywood projects are fantastic, but exposed edges can be an eyesore. This blog post unveils the magic of edge banding - a simple technique to create flawless, finished edges on your plywood projects, making them look professional and ready for paint or stain. Watch the video to learn how to apply edge banding like a pro!


