RON HAZELTON:
Well, I'm on the road again, headed south this time, down to Barnesville, North Carolina. Now Toby and Susan Shelton have a nice set of steps but it's lacking one thing — a banister and that's really important because their new granddaughter has come to live with them.
Toby and Suzy Shelton live in a home that was built by Suzy's great-great grandparents. And now the youngest generation is claiming their stake here as well. Toby and Suzy's two-year-old granddaughter, Hannah. Hannah has recently discovered the thrill of stair climbing.
So this is quite a stairway here. You made this yourself?
TOBY SHELTON:
Yes, sir, I did.
RON HAZELTON:
I like this. This is what — what kind of wood?
TOBY SHELTON:
It's pine.
RON HAZELTON:
Yeah, pegged down here, nice heavy timbers here for the treads. But I can see why you guys need a railing.
TOBY SHELTON:
Yeah.
RON HAZELTON:
Yeah, 'cause she could just take a tumble off here. I've done a little sketch. I'm gonna put this up here so you can see it and I know you want this to have a rustic look. So what I'm thinking are a couple of four by fours here and here.
And then the balusters themselves [HANNAH SQUEALS] square, nothing fancy. Same with the handrail.
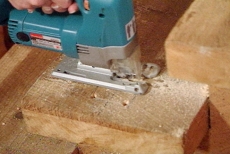
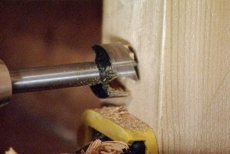
While Toby entertains Hannah, Suzy and I prepare to install the post. I hold it in the proper position and Suzy traces around it. Now we're about to cut this square right out of the tread. First we drill four corner holes. Into one of these, we'll insert the jigsaw blade, then begin cutting.
The holes also allow Suzy to more easily cut around the corners.
There we go.
We slide the post through our opening and use a post level to check for plumb.
Let's look down here. Oh, there he is.
TOBY SHELTON:
You've drilled a hole in the steps.
RON HAZELTON:
You cut a big hole in your steps.
[LAUGHTER]
To secure the post to the staircase, Toby drills a couple of counter sinkholes into the steps. Then he drills smaller shank or clearance holes inside those. He inserts carriage bolts through these holes and secures them with a washer and nut on the inside of the staircase.
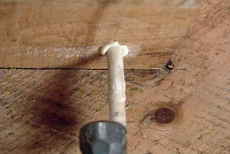
All right, so let's cover up those carriage bolt heads with these — these plugs right here. These are just pieces of oak dowel that we cut off. All right, so you just drop that right in the hole.
TOBY SHELTON:
Hannah, come here, Hannah.
SUZY SHELTON:
Like that?
RON HAZELTON:
Mm-hmm [AFFIRMATIVE]. Push it right in.
TOBY SHELTON:
Look at what Granny's doing. See?
RON HAZELTON:
We'll let the excess glue that oozes out, dry a bit until it becomes rubbery. Then lift it off with a chisel or knife.
So if you just grab that two by four there.
Next, we clamp the railing to the post in order to determine the angle. I've attached a tape measure to a level. Toby holds the level vertical and reads the measurement from the top of the second stair to the bottom of the railing.
TOBY SHELTON:
Thirty two and a quarter.
RON HAZELTON:
On one of the upper stairs, Suzy adjusts the railing until the distance between it and the stair tread is the same as the lower step. Next, Toby draws a line along the bottom of the railing. This line represents the angle at which we'll cut the post to accommodate the railing.
Afterwards, we'll cut a tenon or tab into the top of the post. We'll also cut a groove along the underside of our hand rail. This tenon and groove will create a strong joint between the post and the hand rail. The groove will also receive the upper end of the balusters.
Now to create that tenon, we draw a second cut line below the first.
We're gonna cut away this section right in here. It's gonna leave this, this tongue and that will go up inside the rail. So it's kind of like cutting the — almost like cutting a mortar. Making noise? You like this, like the rhythm we've got going here?
With Hannah grooving to the sound of home Improvement, I cut out the tenon and clean the rough edges with a chisel. Next, we move out onto the porch to rout the groove into the underside of the hand rail.
Okay, there's the — there's half the groove.
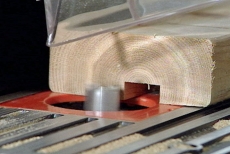
In order to make the groove wide enough to fit over the tenon, we make two passes through the router. Finally, we move back inside to install the hand rail.
Now the easiest way to attach this, Suzy, put this right on the line that you drew there earlier, do you see it?
SUZY SHELTON:
Mm-hmm [AFFIRMATIVE].
RON HAZELTON:
That's it, back there. Okay.
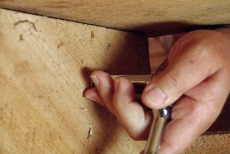
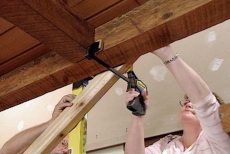
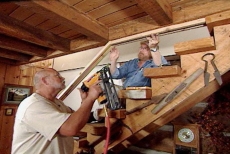
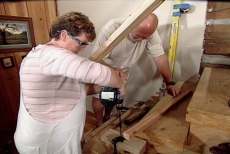
Suzy drills a shank hole, then we attach the hand rail to the ceiling with a lag screw and washer. Down below, Toby drills a hole through the railing and post joint. Now, instead of attaching the two with a bolt, we'll use wooden dowels to go with the handcrafted look of the staircase.
Okay. Now, just cut these little guys off [SAWING SOUNDS].
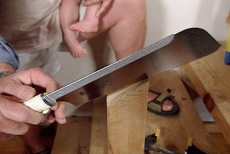
Now our handrail's going to end here, but I want the balusters to continue all the way up here because we don't want Hannah slipping out of the top. So cut this little piece of rail here where we see the of the banisters.
But you go ahead and nail that in, Toby with the — put it right up in the center here. So here's our baluster. Proper angle on one end, proper length. It's going to set in here just like that, okay. It will fit in that groove we cut in the bottom of the rail.
Now, we need to come up with a way to attach this to the stair tread down here.
So what I've decided to do is use wooden dowels for that, okay. And this is just a template that will allow us to drill those holes in the same place.
We'll install two balusters per step. So Suzy and Toby drill two holes all the way through each tread.
Now that we've got the holes drilled in the treads, we need to drill them in the ends of the baluster, again made up a little J here just to make sure that the hole goes right in the center there. Go ahead, I put some tape on there so go down to the tape. That's a brad point drill.
After drilling a hole into the bottom of each baluster, we're ready to install them. We start by applying wood glue to the top of the baluster, inserting it into the groove on the underside of the hand rail.
I'll center you down here, Toby. You slide it into the groove up there, okay.
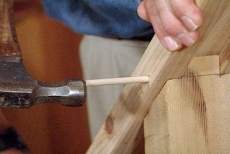
Next, we apply wood glue to the dowels and hammer them through the holes in the stair tread and into the holes on the bottom of the balusters but use a nail gun to attach the tops to the railing.
All right? So we're just gonna continue our way right up the top here. So shall we do another?
SUZY SHELTON:
Let's do —
RON HAZELTON:
It was so much fun. Okay. All right guys, we're making good progress here.
TOBY SHELTON:
Moving right along.
RON HAZELTON:
It's beginning to look like a staircase.
SUZY SHELTON:
Mm-hmm [AFFIRMATIVE].
RON HAZELTON:
All right, last one.
TOBY SHELTON:
That's great.
SUZY SHELTON:
Yea!
TOBY SHELTON:
It looks good.
SUZY SHELTON:
It looks awesome. I'm — I'm quite thrilled with it.
RON HAZELTON:
Our final step is to cut the railing to length. Rather than make a straight cut, we'll round off the end. After all, the railing is for Hannah's safety, and we want to avoid any sharp corners.
SUZY SHELTON:
Okay.
RON HAZELTON:
Huh? No, that's not a problem because here's what we're gonna do right now.
[LAUGHTER]
We're gonna take the sander —
TOBY SHELTON:
Look at there, Hannah, what your granny done. Didn't she do good?
RON HAZELTON:
She's — she is — a little less pressure. All, all the way around.
SUZY SHELTON:
Okay.
RON HAZELTON:
After smoothing out the end of the hand rail with the power sander, our stair railing is complete.
And I guess, the relatives up there on the wall, I'm sure they'll look at what you guys did today and be very proud of the improvement to the house. But the most important thing is, the real ultimate test here is what Hannah thinks of it.
SUZY SHELTON:
That's right.
RON HAZELTON:
Shall we, shall we see? Hannah? You want to try this out?
SUZY SHELTON:
Hannah Banana —
TOBY SHELTON:
You want to try that?
RON HAZELTON:
Huh? Okay, Hannah Banana.
[BOTH SPEAK AT ONCE]
Let's see if it works for you.
TOBY SHELTON:
Take off, take off.
RON HAZELTON:
We did this for you.
TOBY SHELTON:
Go all the way to the top.
RON HAZELTON:
All the way.
TOBY SHELTON:
Come on —
RON HAZELTON:
Bye — can we blow kisses? [MAKES KISSING SOUNDS]. Well, with Hannah heading off to bed, I know that her grandparents will sleep much easier knowing their new stair railing adds a measure of safety while at the same time blending in with the rustic look of their home.