How to Make a Built-in Entertainment Center
Design and Make a Custom Built-in Entertainment Center
Turn a bare alcove into a built-in entertainment center by designing and making a custom built-in entertainment center to suit your lifestyle, using economical off-the-shelf kitchen cabinets as the base.
Read More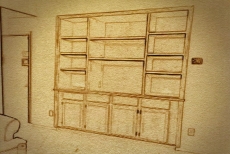
Draw a Rough Sketch
Draw a sketch of your entertainment center with doors and drawers in the base section and adjustable shelving above. Purchase stock kitchen cabinets from any home improvement center.
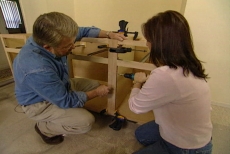
Screw Cabinets Together
First clamp the cabinets together and then secure them with screws. Attach a filler strip on each end to conceal the space between the cabinets and the wall.
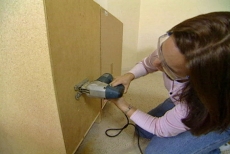
Cut Holes for Access to Electrical Outlets
Cut holes in the back and through the sides of the cabinet to allow access to the electrical outlets as well as the ability to run wires wherever you need them.

Measure, Cut and Install the Countertop
Measure for the countertop and transfer to a sheet of ¾ inch plywood. Cut with a circular saw and attach to the base. Cut a piece of 1 x 8 poplar with a notch, to fit around the corner and conceal the edge of the plywood.
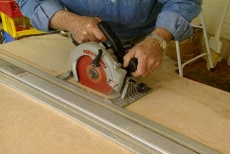
Prepare the Upper Portion of Entertainment Center
Using a circular saw and a clamp-on straight edge as a guide, cut the sides, bottoms and top from sheets of ¾ inch birch veneer plywood.
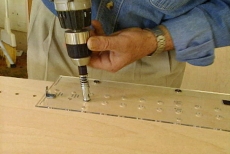
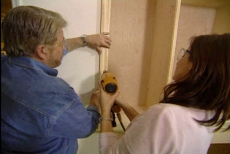
Drill Holes For the Pins Which Will Support the Shelves
Measure and draw a baseline. Align and clamp a pre-drilled plastic template to the cabinet’s side. Drill a series of holes about two-thirds of the way through the wood. Repeat on all cabinet sides.
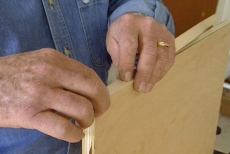
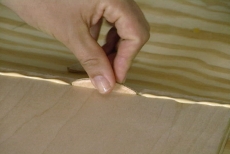
Conceal the Edges of the Plywood
Conceal the edges of the plywood by applying edge banding – a thing strip of wood with heat-activated adhesive backing. Trim and sand.
Finish the Shelve Edges
Face the edges of the shelves with a solid piece of 1 x 2 lumber. This will make the shelves more rigid and look thicker and more substantial.
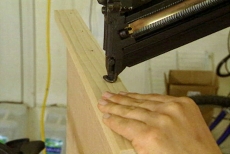
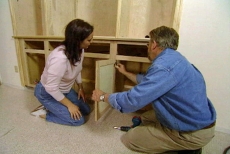
Assemble the End Section Using Biscuits
Position the end pieces together using wooden biscuits or splines, by cutting slots with a plate joiner, filling with glue and setting the biscuits inside. Apply more glue to the wood surface and press the pieces together. Nail the pieces together.
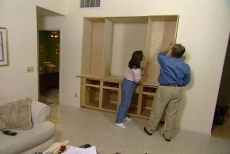
Complete Assembly Process
Repeat the assembly process for all three upper cabinets and assemble all the units. Secure cabinets together with screws.
Cut and Apply Trim Strips and Molding
Secure cabinets together with screws. Cut and attach trim strips to the front edge of the cabinets to conceal the joint. Cut and attach molding or casing to the outside of the unit.
Finishing Touches
Mount the cabinet doors, install the drawers and set the shelves into position.
Related Tips


Blog Articles

Expert Tips: How to Mount a TV on the Wall
Get step-by-step instructions on how to mount a TV on the wall, especially for big screen TVs. Master the art of wall mounting with our tips.

Frustrated by Stripped Screws? Here’s How to Get Them Out Fast
We've all been there. You're in the middle of a project, and suddenly your screwdriver spins uselessly in the screw head. The screw is stripped, and frustration sets in. With a little know-how and this simple trick, you can tackle a stripped screw and get your project back on track.

The Secret to Finishing Plywood Edges
Plywood projects are fantastic, but exposed edges can be an eyesore. This blog post unveils the magic of edge banding - a simple technique to create flawless, finished edges on your plywood projects, making them look professional and ready for paint or stain. Watch the video to learn how to apply edge banding like a pro!


