How to Install Laminate Flooring
Install Low-maintenance and Durable Laminate Flooring in the Dining Room to Eliminate Carpet from a High-wear Area
Replace high-maintenance dining room carpet with durable easy-to-clean laminate flooring that resists the wear of foot traffic from an exterior door, the dog, and dining table chairs dragging back and forth across it. The laminate floor installs easily on the concrete subfloor and, in this home, visually divides one large area into two rooms with separate functions.
Read More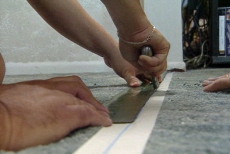
Mark the Dining Room Boundary for the Laminate Flooring
Divide the room at the desired boundary between carpet and laminate flooring with a strip of masking tape and a chalk-line struck on top. Lay a straight-edge along the chalk line and cut the carpet with a linoleum/carpet cutter.
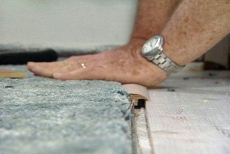
Remove the Carpet and Pad to Prepare for the Laminate Flooring
Lift the carpet off the tack strip at the room's perimeter. Roll up the carpet pad beneath and pry the tack strip off the subflooring. The exposed concrete subfloor will be covered with a special underlayment for laminate flooring.
Install Trim Tack Strip between the Carpet and Laminate Flooring
Pre-Drill holes in the subfloor with a carbide-tipped masonry bit to install a trim tack strip to join/transition between carpet and laminate flooring. Clear dust from holes with compressed air and tap in plastic anchors before attaching with screws.
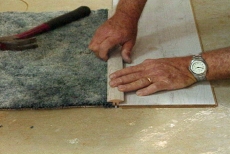
Join Panels of Laminated Flooring Underlayment As a Moisture Barrier
Install laminated flooring underlayment as a moisture barrier, cushioning layer, and correction for minor surface imperfections in the concrete subfloor. Unroll and cut pieces to length, butting the edges (rather than overlapping), and taping the joints with duct tape.
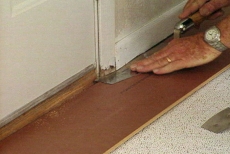
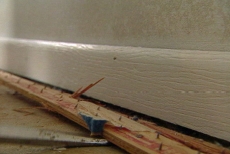
Trim Door Casing to Fit Laminate Flooring beneath the Wood
Use a Japanese side saw to saw off the bottom of the door casing to enable fitting the laminate flooring between the wooden trim and the concrete subfloor. Use piece of laminate flooring as a thickness gauge.

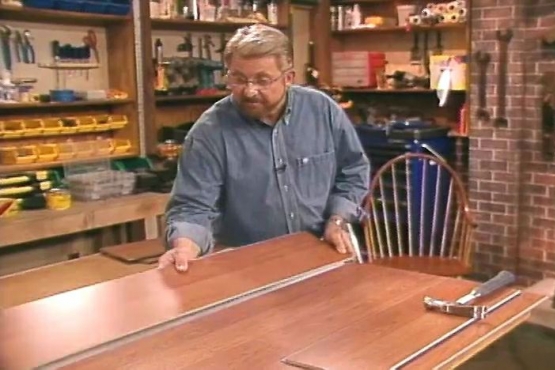
Cut Laminate Flooring with a Sliding Power Miter Box
Cut several rows of laminate flooring with a sliding power miter box. Score the top, pulling the blade towards you and cut through while pushing the blade away. Making cross cuts in this way helps reduce chipping.
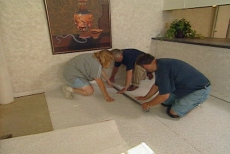
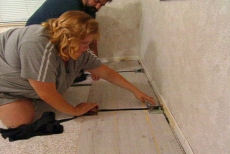
Position and Fit Laminate Flooring to Wall Imperfections
Secure joints temporarily with duct tape and use a template to locate bowed and crooked walls. Cut to correct. Position with a 1/4 inch expansion gap between the laminate flooring and baseboard with special wedge-shaped spacers and test fit.
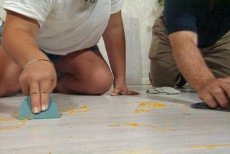
Disassemble Test Pieces of Laminate Flooring and Reinstall Permanently
Disassemble the test laminate flooring. Apply glue to the tongue and the groove. Join and confirm that tongue and groove are properly seated. Use flooring band-clamps to hold joints securely until the glue dries in an hour.
Remove Dried Glue from Laminated Flooring Joints
Scrape dried glue gently from the laminated flooring joints, running a plastic putty knife across the seams to avoid scratching. Follow up with a damp rag to lift any remaining dust and residue.
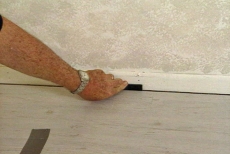
Seal Edges of Laminate Flooring with Appropriate Trim
Install quarter-round molding over the laminate flooring at the wall. Secure it with a pin nailer. Finish the joint between the laminate flooring and the remaining carpet by tapping the decorative transition strip into place on the base trim tack.
Related Tips

Blog Articles

Expert Tips: How to Mount a TV on the Wall
Get step-by-step instructions on how to mount a TV on the wall, especially for big screen TVs. Master the art of wall mounting with our tips.

Frustrated by Stripped Screws? Here’s How to Get Them Out Fast
We've all been there. You're in the middle of a project, and suddenly your screwdriver spins uselessly in the screw head. The screw is stripped, and frustration sets in. With a little know-how and this simple trick, you can tackle a stripped screw and get your project back on track.

The Secret to Finishing Plywood Edges
Plywood projects are fantastic, but exposed edges can be an eyesore. This blog post unveils the magic of edge banding - a simple technique to create flawless, finished edges on your plywood projects, making them look professional and ready for paint or stain. Watch the video to learn how to apply edge banding like a pro!


