Pull-Out Trash Bin – 10 Easy Steps To Make Pull-Out Trash Bin
Convert the Under-Counter Space behind a Single Kitchen Cabinet Door and Drawer for a Hidden Pull-out Trash Bin
Leave that unsightly garbage bin hidden under the kitchen counter, put it on drawer glides to make a pull-out trash bin that lets you avoid touching during food preparation. Learn how to convert the space behind a cabinet door and drawer, leaving the raised-panel face and drawer pulls to both camouflage and access the large waste bin behind.
The spring-type assembly clamps used in this project are no longer available from Woodcraft Supply. Instead Ron recomends this alternative fro Rockler.com.
Read More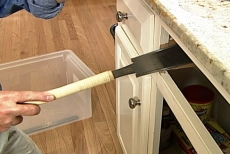
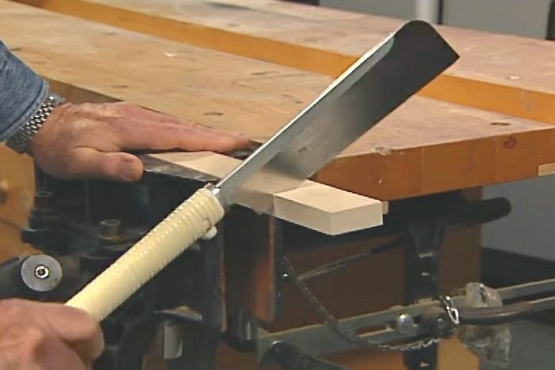
Remove the Cabinet Door and Drawer
Remove the cabinet door and drawer from the front of the trash bin space. Their raised panels will be reused later. Remove the existing drawer glides. Use a Japanese handsaw to cut out the rail that separates the two openings.
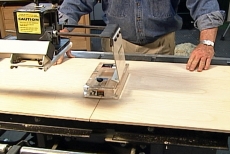
Cut All the Wooden Panels on a Table Saw
Cut out all the components for the base and sliding trash bin box on a table saw before beginning assembly. Use cabinet grade birch veneer to make each panel with a smooth paintable finish when the project is complete.
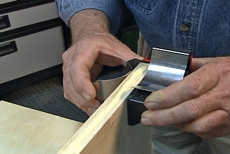
Glue and Nail together the Three Panels for the Base
Coat the edges of the base panels with glue and lap the edges flush. Hold them together with a positioning clamp until you secure them with a pneumatic nail gun.
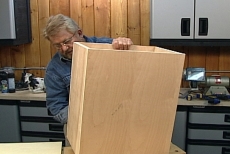
Assemble a Closed Box for the Sliding Trash Bin
Glue and nail six panels into a closed box for the moving portion of the pull-out trash bin. Lap the glued joints flush and hold them in place with a positioning clamp until secured with nails.
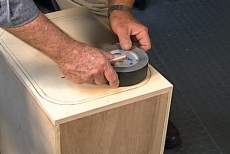
Mark a Cutline for an Opening in the Closed Box
Trace the top rim of the garbage can on the closed box. Draw a cutline for the trash bin opening 1/2-inch inside the traced line, using a roll of tape or other circular object to round the corners.
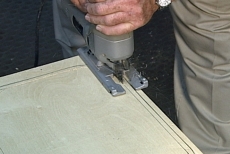
Drill a Starter Hole inside the Cutline
Drill a large starter hole inside the cutline for inserting the blade of your jigsaw. Cut the opening along the inside line, making a smooth cut. Remove the cutout
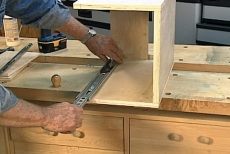
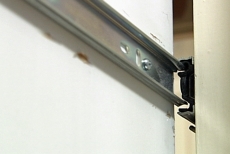
Install Ball-bearing Full-extension Drawer Glides on the Base and Box
Purchase two ball-bearing full-extension drawer glides. Separate each glide and mount one piece inside the base and the other one on the side of the box in corresponding positions. Paint the stationary base and the sliding box.
Positioning the Pull-out Trash Bin Base in the Cabinet
Slip the pull-out trash bin base in the cabinet, positioning it flush against the inside of the cabinet face. Secure it by driving screws through pilot holes in the base and into to the cabinet floor beneath.
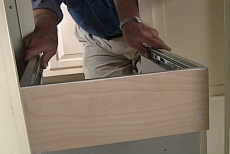
Insert the Sliding Box to Engage the Drawer Glides
Insert the pull-out trash bin box into the base, matching the glides on the side of the box with those inside the base. The box must be movable, so no nails or screws will secure it.
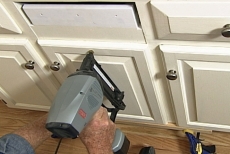
Pin the Original Door and Drawer Face to the Box
Attach the raised panel face from the cabinet door and drawer removed earlier. Pin them to the front of the pull-out trash bin box with a pin nailer. Secure the panels permanently from the inside of the box with screws.
Related Tips


Blog Articles

Expert Tips: How to Mount a TV on the Wall
Get step-by-step instructions on how to mount a TV on the wall, especially for big screen TVs. Master the art of wall mounting with our tips.

Frustrated by Stripped Screws? Here’s How to Get Them Out Fast
We've all been there. You're in the middle of a project, and suddenly your screwdriver spins uselessly in the screw head. The screw is stripped, and frustration sets in. With a little know-how and this simple trick, you can tackle a stripped screw and get your project back on track.

The Secret to Finishing Plywood Edges
Plywood projects are fantastic, but exposed edges can be an eyesore. This blog post unveils the magic of edge banding - a simple technique to create flawless, finished edges on your plywood projects, making them look professional and ready for paint or stain. Watch the video to learn how to apply edge banding like a pro!


