How to Install Weather Stripping on an Entry Door for a Tight Seal
My Choice for Door Weather Stripping
A 1/32” gap around the edge of an entry door can let in as much cold air as a two-inch hole smack in the center. Imagine how that would feel on a wintry day.
The good news is you can eliminate drafty leaks around exterior doors with this simple-to-apply weatherstripping that installs in minutes and lasts for years. The integrated vinyl tubing makes an excellent seal against moisture and air.
With the door closed, measure the length of the doorstop on the hinge side of the door frame. Then, transfer that measurement to a length of weatherstripping.
Next, draw a straight cutting line. Cut the vinyl tubing with a utility knife and the metal with a hacksaw, using a very fine 32-tooth-per-inch blade. Using a self-centering drill bit, drill pilot holes and then install the screws. When the right and left sides are in place, measure and cut the top. Attach the top piece the same way the sides. With the weatherstripping installed, you can tell just by the sound of the closing door that it's well sealed and that drafts are going to stay outside where they belong.
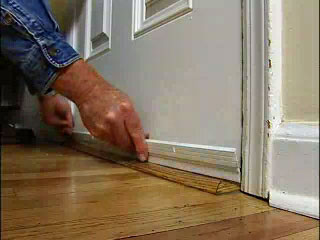
Sealing the Bottom of a Door
One of the easiest to install solutions for the bottom of an entry door is a door sweep like the one pictured here. These are available from hardward stores, home improvment centers and Amazon. Click here to view.
Blog Articles

Expert Tips: How to Mount a TV on the Wall
Get step-by-step instructions on how to mount a TV on the wall, especially for big screen TVs. Master the art of wall mounting with our tips.

Frustrated by Stripped Screws? Here’s How to Get Them Out Fast
We've all been there. You're in the middle of a project, and suddenly your screwdriver spins uselessly in the screw head. The screw is stripped, and frustration sets in. With a little know-how and this simple trick, you can tackle a stripped screw and get your project back on track.

The Secret to Finishing Plywood Edges
Plywood projects are fantastic, but exposed edges can be an eyesore. This blog post unveils the magic of edge banding - a simple technique to create flawless, finished edges on your plywood projects, making them look professional and ready for paint or stain. Watch the video to learn how to apply edge banding like a pro!


