How to Convert a Door into a Bookcase

Video Transcript

Video Transcript

RON HAZELTON:
Today, I’m on my way to visit Phil and Arlene Safier in Albuquerque, New Mexico.  They call themselves two old hippies and run an Internet business from their home. But it's not their home office that needs help, it's their guest bedroom — two rubber un attractive closet doors break up the wall, so the Safiers would like to replace them with doors that double as display cases and I'm going to help.
ARLENE:
It's so nice to meet you.
RON HAZELTON:
Oh, thank you.
ARLENE:
Come on into the house.
RON HAZELTON:
I've drawn up some plans for the project and go over them with Phil and Arlene.

This is what I had in mind here. This is essentially a case or box, if you want to think of it that way, with shelves that we'll put in here. And we can space those shelves any way you guys want them, depending on what you're going to put in there. Now this will be just about the same size as your door. We're going to take the door out and then we're going to place this in the opening, on hinges, so it will swing out.

And then to make it a little bit more decorative and also to hide this joint here, I want to put on some decorative moldings like these fluted moldings, put some corner blocks up here, alright? So what I want to do now is, is set up sort of a temporary shop in your garage because we're going to have to do some cutting here.

We're about to cut strips of plywood that will be used to make up the sides, top, bottom and the shelves of our units. Each piece will be five and one half inches wide.

Now this is the stuff we're going to make your bookcases or cabinets from. This is three-quarter-inch-thick birch veneer plywood. It's the best material for the sides and the shelves. We'll use something else for the back.

After measuring and marking the plywood, we attach a self-clamping straight edge. Running the base of the circular saw along the straight edge will guarantee a perfectly straight cut. After cutting several strips to width, we move on to the chop saw to cut them to length.

In almost any cabinet-making project, you end up having to cut a number of pieces of wood to the same length, and we're going to be working on the shelves right now. We need several of those at 21-and-a-half inches. Now we could measure and mark each one of those but you're always going to get some error when you do that.

So we're going to measure once and then we're going to cut a number of these, as many as we need, without measuring again.

To make these consistent cuts, we attach a wood block called a workstop, 21-and-a-half inches from the saw blade, the length of the shelves. When the wood contacts the workstop, Phil lowers the saw.
ARLENE:
Okay.
RON HAZELTON:
And he and Arlene take turns cutting the shelves. [SAWING SOUNDS] With all the shelves cut, we next cut the two side panels to length.
PHIL:
Right in, another side.
RON HAZELTON:
Now it's time for assembly.

And then over here, I've done something which will help us assemble the corners. I've just stacked up some blocks here, nailed them together so that when we get ready to attach it, which we'll be doing in just a second, this will kind of help us sort of orient everything in the right position.

Arlene begins the assembly process by drilling pilot holes through the top panel of the display case. Next, Phil runs a bead of glue right over the pilot holes. We press the top panel to the side panels using our assembly blocks and then secure them with screws.

We repeat the process with the bottom panel and now we're ready to move onto the shelves.

I've asked you guys to bring down some of the typical things you're going to have on here 'cause now is the point where we have to decide what our shelf spacing is going to be. So what we can do is kind of temporarily lay a shelf in here. And Arlene, just see if some of that's going to fit. And if it doesn't, then just move that shelf down or up.
ARLENE:
All right, I'm going to move this down —
[BOTH SPEAK AT ONCE]
RON HAZELTON:
— more room in there, okay.
ARLENE:
And I think it should have some space above and below, okay?
PHIL:
Move that one down and see how that looks.

ARLENE:
All right. That feels about right, but I would like to see it with just four shelves if we can to see —
[BOTH SPEAK AT ONCE]
RON HAZELTON:
Okay.
PHIL:
I'm going to take this one out.
ARLENE:
Okay. I think I agree. I'll move these down.
PHIL:
Actually — I like that better actually.
ARLENE:
I think I do too.
RON HAZELTON:
Four shelves. Well, that will make it easy.

I use a combination square to mark the final position of the shelves. Then we run a bead of glue over the ends and attach them with screws.

Now we're going to put one more board in right down here. This is actually not a shelf, it's more like a false bottom. And what it's going to do is give us a surface to which we'll attach a piece of trim later on. So the same idea. Put some glue on the ends right here.
ARLENE:
Okay.
RON HAZELTON:
Put it in place and screw it in position. Now all of our shelves are in, so now it's time to put the back on. If you guys would lay a bead of glue all the way around the outside and across the back of the shelves —
ARLENE:
Okay. I like doing that.
PHIL:
Here we go.
RON HAZELTON:
I think Phil's got a future in cake decorating. I really do. Just drop that right on —

The back of the bookcase is put in place and secured with an air-powered stapler. We've transferred the shelf lines to the back panel so that we can see where to put the staples.

Now we're going to have some fun.
ARLENE:
Good. I'm looking forward —
[BOTH SPEAK AT ONCE]
RON HAZELTON:
We're going to decorate and embellish this basic case here, starting with this fluted molding here and then on the bottom of that, we're going to place what's called a plinth block. This is supposed to simulate a column and this would be the base of the column.

And then across the bottom, I want to add something like this. This is a baseboard. Remember when we put this extra shelf in earlier?
ARLENE:
Right.
RON HAZELTON:
That's so we can support both sides of this. So this will go on here. So let's start down here at the bottom and then work our way up to the top, okay?

We attach the plinth block and the rest of the molding with a combination of glue and nails. We've also decided to add wooden rosettes to the top corners. These decorative moldings are only attached to one side of the case. A matching set will be attached later, but not to the case. Rather to the bedroom wall and the hinged side of the door in order to allow the case to open and close without binding.

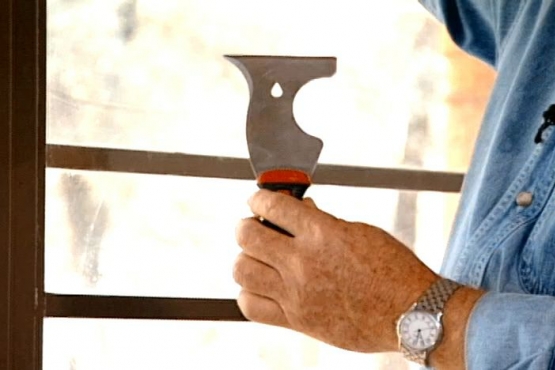
Now to create a lip for the shelves, we attach narrow strips of wood along each front edge. While Phil and Arlene assembly the second display case, I move up to the bedroom to remove the old closet doors. I use a utility knife to cut through the paint and caulk at the edge of the door casing, which also has to be removed.

A putty knife slipped behind the casing, protects the wallboard while I use a flat bar to pry the casing off. I also use a pry bar to remove the old doorstop.
ARLENE:
Boy, you've been busy.
RON HAZELTON:
I have been busy up here. Well, here's the problem. Not a problem but it's just a situation. We took off the casing around the door because we had to have that flat. Now what we're left with is this kind of ugly joint here and this unfinished wallboard.

So, I want to put this flat molding on here, and you came just in time.

Arlene attaches the molding with a nail gun. After giving it a coat of paint, we're ready to install our first display case.

Right, let's stop — just a second here, Phil — done a couple of things. I have extended some lines around onto the casing here of this trim we put up earlier, showing the location of the old hinge mortise. And I've put a couple of pieces of plywood down here, thin to act as shims. I want to get this up off the carpet, okay.

So just bring it in, lift it up, tip it forward on top of the shims.

We rest the bookcase on the shims and I transfer the hinge marks from the door casing to the shelving unit. We lay the bookcase on the floor and Phil attaches the hinges. Then we hang the door. Once it's in place, Arlene completes the job by nailing the remaining decorative moldings, plinth blocks and rosettes to the wall.

Hey, guys it turned out really nice. You know, we started this morning with a couple of plain closet doors. And now you've got a closet gallery.
PHIL:
It looks great, Ron.
RON HAZELTON:
A swinging exhibit, I think we'll call it that.

The doors dress up the Safier's guest room without sacrificing space. They're practical and dramatic. Sort of like something out of an old movie where bookcases move to reveal secret chambers. Even if this chamber is just for clothes it's one guests will never forget.

Learn how to convert an existing door into a bookcase; includes step-by-step instructions along with tips.

I'm  fascinated by hidden rooms and secret passageways.  Although the intent here was not so much to create a clandestine corridor to a cloak-and-dagger space as it was to eliminate some unattractive doors and add much needed storage and display space, it nonetheless allowed me to fantasize bit.   It's a great way to add some visual interest, especailly to a smaller room and, of course, the shelving is perfect for books,  photos and decorative objects.  Because this is a swinging door, though, make sure whatever is placed on the shelves has a stable base and does not tip easily.  Here,  this was an adult project, but kids would love it.

The clamp-on straightedge used in this project is very handy for accurately cutting panels out of plywood sheets.  If you'd like more information about this tool, you can find it by clicking here.

26Project Comments

We welcome your ideas and suggestions. Read through comments from other readers or leave your own.

Just how much smaller was the book case to the original opening?

avatar
Rich
Mar 28, at 3:56am

Cool little project.  I second the idea of using casters as additional support to offset some of the load on the hinges.

I am a shop teacher, so big SAFETY tip.  Using a “work stop” as it was called is a great idea and is strongly recommended.  Often it is more important that the shelves, in this case, are the exact same length rather than a certain measurement.

However the safety rule that was violated, was that the work between the blade and the work stop was not held down or clamped.  This is invitation for kickback.  Simply placing the work stop on the other side of the blade, or cutting with the opposite hand on the saw to be able to hold down the work would have sufficed. 

Also when using a miter saw, NEVER cross your arms to hold the work down while cutting.

If you don’t have time to act safely the first time, when will you have time to come back and redo it safely?

avatar
Jason
Mar 17, at 12:04am

I do not think that but joints glue and screws provide enough strength especially from racking. This bookcase is being held up one one side only and the force of a couple of shelves of books is certain to make the case rack and the hinges are likely to fail as well.

avatar
Stephen Fox
Feb 26, at 12:07am

One way to overcome the weight issue of the unit and items stored on it is to add heavy duty casters to the bottom of the unit. The door jam and hinges no longer carry all of the weight.

avatar
doug
Feb 5, at 1:22am

I noticed at the end that the wife had to open the door somewhat slowly, in order to not cause items on the shelves to shift or fall off.  I like the project, but I would be careful not to put anything too fragile on those shelves, just in case!

avatar
Larry
Jan 22, at 1:42pm

I really like this, but I would have preferred the hinges to be hidden.
Any Ideas

avatar
Jeremy
Dec 23, at 12:16pm

I wonder about doing this on a smaller scale in my kitchen to put a spice rack on the outside, or decorative items.  Hmm, something to ask the hubby to do.  I would like a secret door with hidden hinges too.  Maybe carry it a little further to make it a safe room and that could be latched from inside.  Such as an above ground tornado shelter would be a possibility.

avatar
Karen
Nov 27, at 5:27pm

There were a number of comments as to the size of the bookcase to the original door. The width was given, and the size(s) “varies” as to the original size of the door at your house.
Help Hiding the hinges can be done by blind routing the long wall molding that matches the one that is on the door.

avatar
Dave
Nov 22, at 8:52pm

I like the door bookcase . I have had fixed something simler to that in the hallway so when i have to repair the shower piping i could get to it fast an cut down on water damage its not as deep as the closet door it beets replacing sheetrock thanks joe

avatar
joe butler
Nov 21, at 6:55pm

usually teh projects you’re involved in are woth viewing. this one however,

is a total waste of time, materials, effort and money.  there are some you

should turn down< Ron.

avatar
ralph guerra
Nov 21, at 8:52am

How much smaller is the bookcase then the original door? It has to be able to swing out of the door frame. And how would you hide the hinges so they don’t show.  Also are we limited on the weight of the books placed on the shelf s ?

avatar
Terry Mairs
Nov 21, at 4:34am

Great Idea. I agree with a few that commented about the hinges, but for different reasons. The depth of the bookcase is the how much the entry way would be narrowed. There are hinges that would allow for the door to clear the entire entry way, and would also be completely hidden. I don’t think they would be capable of supporting the weight. Another modification I would make is on the bottom. A simple match of the baseboard would complete the effect of a built in wall bookcase, but that is just a matter of preference.

Still a great idea and a fine piece of work!!

avatar
George K. Archibald
Nov 21, at 12:59am

I’m going to be replacing an old window between our bathroom and the our newer garage with a 4’x30"x18” closet, similar to what you’ve done with this door, only it won’t open (obviously). I was originally going to try and stud out the closet, but just making it out of plywood seems easier and more sturdy. I’m just wondering if I make the closet out of 3/4” plywood, what would be the best way to insulate the closet on the garage side, since it’s an unheated space?
I plan on using a masonite bifold door, which I’ll have to cut down to 48” high and re-add the framing at the bottom since they’re hollow. I can’t seem to find any doors that are less than 80” tall, so this is probably my best option.


avatar
Pat the Rat
Nov 20, at 10:57pm

I’ve been wanting to do this for years.  I’d like to see the hinges hidden, though.  I’d also like to use the case for DVDs and Blu-Ray disks so would weight become a limiting factor?  Suggestions?  Thanks.

avatar
Del Holford
Nov 20, at 7:22pm

I was going to sugest magnets for a lach but I seen some one else also had that idea.

avatar
Raymond Hamerly
Nov 20, at 4:59pm

The diagonal measurement across the width of the new case from front to back would have to be known, plus a 1/4” for clearance in order to make the bookcase for width.
A piano hinge can be used if you want to conceal the access.

avatar
Daniel Bonin
Nov 20, at 12:18pm

I used magnet door closers commonly found on kitchen cabinets. I placed one at the top and one at the bottom. keeps the door closed but opens easily with slight pressure. They were a dollar a piece and very easy to install.

avatar
rick lowrance
Nov 20, at 10:59am

That is so cool.  Will try this just over the existing door. You are so smart and fantastic.

avatar
Carol Cole
Nov 20, at 9:15am

Sounds fascinating. I think i will try this one. Looks much nicer than a regular closet door in the main living area especially.

avatar
Franklin P Lee
Nov 20, at 8:42am

Along with Dan’s question, what keeps it closed? If the house were even slightly off level the case would either swing open, or not close fully.

avatar
Mike
Nov 20, at 8:40am

unless the door opens 180 degrees, access will be limited.

avatar
robert fairbanks
Nov 20, at 8:24am

Another tip for a future email is how to make the cutting guide. You can make one customized for your circular saw from scrap plywood so that you don’t have to account for the distance between the edge of the saw base and the blade and lay the edge right on the cut line.

avatar
Andy Thornton
Nov 20, at 8:05am

Another detail is a method to keep the bookcases closed flush with the wall. What would replace the old doorknob and latch?

avatar
Dan
Nov 20, at 7:48am

What a great idea! If you hide the hinges, you would have a secret room.
These Sunday morning emails are great, Thanks!

avatar
Maury
Nov 20, at 6:12am

I have had the same concept in my head for the last 15yrs. My thought was to put up an entire wall library in 3 pieces. With the middle section to slide open for access to the closet. The upper half of my house has 3 rooms, so I ws going to create a library/office with a hidden closet. Maybe throw in a revolving hanger like at the dry cleaner.  Thanks for all of your ideas.

avatar
JoLynn Candella
Nov 20, at 2:34am

and how much smaller was the bookcase the the origonal door? It had to be able to swing out of the door frame.

avatar
mike
Nov 20, at 1:58am

Submit A Comment

If you have a comment, question, or suggestion about this project, submit it here.

All Fields Are Required

Please enter the word you see in the image below: