How to Install a Copper Stamped Metal Ceiling
Stamped Metal Ceilings Bring Back the Past or Accent the Modern
This post is in partnership with Decorative Ceiling Tiles. The opinions and recommendations are my own.
For more information on the ceiling tiles featured in this video Click Here. For more on the crown molding Click Here
Stamped metal ceilings were quite the rage beginning in the late 1800’s. Originally, they were intended as a less expensive way to replicate the ornate carved and cast plaster ceilings popular in Europe. Metal ceilings are still with us and in more varieties than ever.
For this 200-year-old home, they seemed to be the perfect enhancement to the dining room that was added 150 years ago.
Read More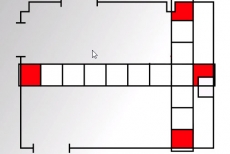
Decide on the Tile Layout
The goal in coming up with a good layout beforehand is to ensure that the partial tiles around the perimeter of the room are uniform and balanced. In nearly every situation, installation begins at a point near the center of the room.
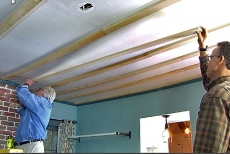
Install Furring Strips
The tiles will be attached with nails. The nails would not have adequate gripping power in wallboard or plaster, so we’ll need to add either a layer of plywood or narrow furring strips. We use the furring strips which are run perpendicular to the ceiling joists and attached with screws.
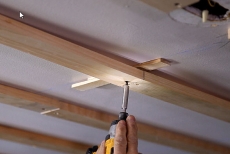
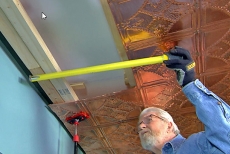
Shim to Create a Flat Nailing Surface
If the ceiling is not flat, and this one certainly is not, wooden shims are installed between the furring strips and the ceiling and adjusted until the furring strip surfaces are even. Either taut strings or a laser level can be used verify a flat surface.
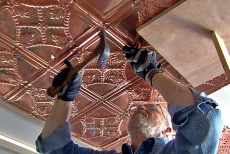
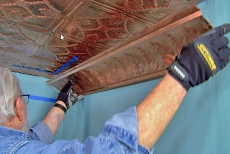
Nail Up the Tiles
The tiles are overlapped, and at twelve-inch intervals, cone-head nails driven through the edges and into the furring strips or plywood. This part of the job is best done with two people.
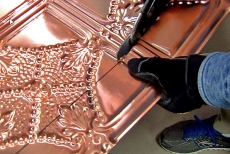
Cut Tiles with Aviation Snips
Full tiles can be trimmed to size, notched to fit around corners and cut out for vents and electrical boxes using aviation snips. Metal tiles have sharp edges, so wear gloves when working with them.
Put Up Perimeter Tiles
Once all the full tiles are installed, partial tiles are cut to size using aviation snips and nailed into place around the edges of the ceiling.
Install Cornice Molding
Finally, the edges, where the ceiling meets the wall, are covered by decorative cornice molding which is also nailed in place.
Blog Articles

Expert Tips: How to Mount a TV on the Wall
Get step-by-step instructions on how to mount a TV on the wall, especially for big screen TVs. Master the art of wall mounting with our tips.

Frustrated by Stripped Screws? Here’s How to Get Them Out Fast
We've all been there. You're in the middle of a project, and suddenly your screwdriver spins uselessly in the screw head. The screw is stripped, and frustration sets in. With a little know-how and this simple trick, you can tackle a stripped screw and get your project back on track.

The Secret to Finishing Plywood Edges
Plywood projects are fantastic, but exposed edges can be an eyesore. This blog post unveils the magic of edge banding - a simple technique to create flawless, finished edges on your plywood projects, making them look professional and ready for paint or stain. Watch the video to learn how to apply edge banding like a pro!


