How to Install a Cupola and Weathervane
Crown the Roof, Old or New, with a Simple Project to Install a Cupola and Weathervane Kit
Top a brand new barn or a weathered outbuilding with this simple project to install a weathervane kit. The eye-catching copper weathervane crowns the wooden cupola formed from a base, midsection and top/copper roof. Shape the cupola's base with a jigsaw to straddle the roof ridge, installing it for a close fit before the roof cap is added.
Read More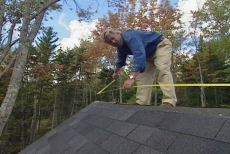
Mark the Cupola Position on the Center of Roof Ridge
Find the center point of the roof line by running a tape measure along the roof ridge. Mark the center point with a pencil as the position for the cupola base.
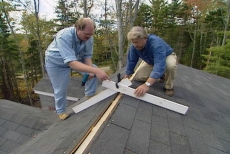
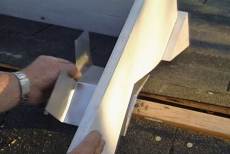
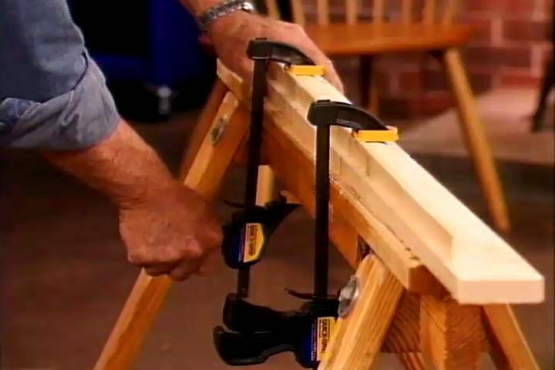
Create a Bevel Gauge to Help Shape the Cupola Base
Angle two crossed one-by-fours along the roof slopes as a bevel gauge to determine the exact angle of the roof for the cupola base. Screw them together. Draw a precisely vertical line at the intersection of the arms.
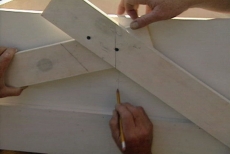
Draw a Plumb Line on the Cupola Sides
Draw a vertical line from top to bottom of the cupola base using a square to ensure it is plumb. Any pair of opposing sides will serve, because the cupola base is square.
Align the Bevel Gauge on the Cupola Base
Align marks on the cupola base and bevel gauge on one side, tracing the bottom edge of the bevel gauge arms. Repeat on the opposing side, ensuring that the bevel gauge intersects the front corners each time.

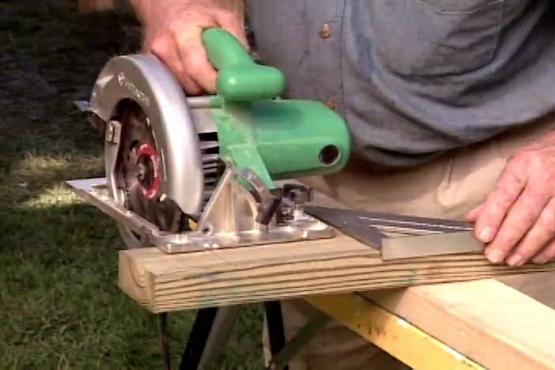
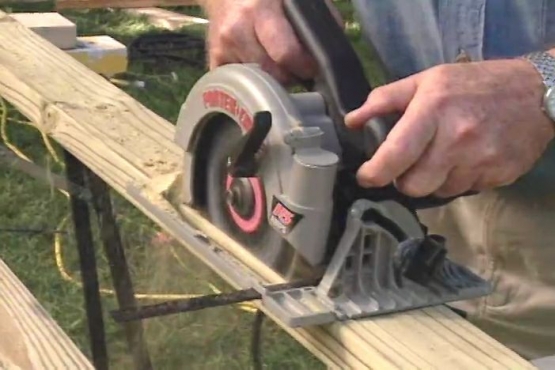
Saw the Cupola Base along the Traced Guidelines
Cut along the traced guidelines on opposing sides of the cupola base with a jigsaw, removing part of the base at the back. Position the base over the roof ridge to test the fit and confirm it is level.
Install Flashing beneath the Cupola Base
Cover the seam between the roof and the cupola base with metal flashing to prevent water seepage underneath. The ridge cap will be installed over the flashing.

Secure the Cupola Base to the Roof
Adhere "Water and Ice" barrier on two pairs of two-by-four blocks for a water-tight seal. Screw them to the roof inside the cupola base (a pair on either side of the cupola base) and then to the base itself.
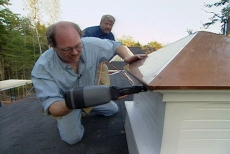
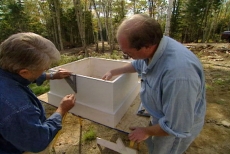
Position the Middle Section over the Cupola Base
Center the middle section over the cupola base with equal overhang on all sides and nail it to the base. Position and nail the upper section with the copper roof to the middle and secure with nails.
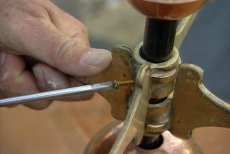
Completing the Cupola Kit with the Weathervane
Insert the cupola kit's copper weather vane through the hole at the top, aligning its points with compass directions and tighten the set screw. Insert the rotating module (here, a sailboat) over the top to complete.
Related Tips


Blog Articles

Expert Tips: How to Mount a TV on the Wall
Get step-by-step instructions on how to mount a TV on the wall, especially for big screen TVs. Master the art of wall mounting with our tips.

Frustrated by Stripped Screws? Here’s How to Get Them Out Fast
We've all been there. You're in the middle of a project, and suddenly your screwdriver spins uselessly in the screw head. The screw is stripped, and frustration sets in. With a little know-how and this simple trick, you can tackle a stripped screw and get your project back on track.

The Secret to Finishing Plywood Edges
Plywood projects are fantastic, but exposed edges can be an eyesore. This blog post unveils the magic of edge banding - a simple technique to create flawless, finished edges on your plywood projects, making them look professional and ready for paint or stain. Watch the video to learn how to apply edge banding like a pro!


