How to Make Twin Closets on a Wall
Build Twin Closets with Narrow Double Doors That Hide the Interior Shelves and Hanging Storage Space While Requiring Minimal Clearance
Construct two spacious closets on an empty wall and transform unused space into much-needed shelf and clothes-hanging storage. Mount ready-made raised panel doors on each closet--in this case, narrow double doors that require minimal clearance space to open--and your DIY project blends in with the rest of the decor for an attractive and practical addition.
Read More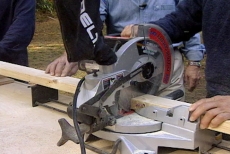
Plan the Closets and Cut Two-by-fours to Dimension for Framing
Plan the closet dimensions and features to accommodate your room and furniture as well as your storage needs. Cut two-by-fours for interior closet framing with horizontal components at the ceiling and floor and vertical components between.
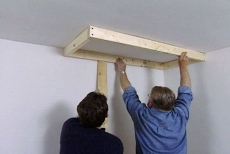
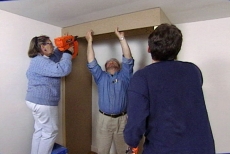
Assemble Frames and Attach the Components to Studs
Locate and mark studs with an electronic stud finder. Construct top frames as individual units, drilling clearance holes and driving in screws to secure joints. Support temporarily with two-by-fours and screw through frames directly to the wall studs.
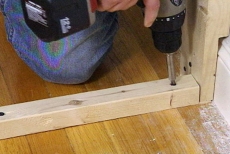
Cut Vertical Supports and Secure with Toggle Bolts and Screws
Cut and notch two-by-four vertical supports to clear the baseboard. Pre-drill the wall stud for a toggle bolt to secure the post and drive-in screws to attach posts to the upper frame and the baseboards.
Install Framing for the Corner that Juts into the Room
Finish the closets' horizontal floor framing from the wall to the inner corner that juts into the room--essentially the depth of the closet. Secure the final vertical post to the framing and ceiling to complete the interior structure.
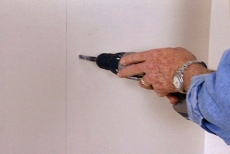
Face the Sides of the Closets with 3/4-Inch MDF
Install left and right sides to each closet. Use 3/4-inch thick medium-density fiberboard (MDF) and attach panels with a cordless nail gun. Add fascia boards across the top front of the frames and secure with a nail gun.
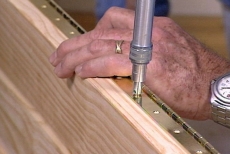
Mount a Piano Hinge on Each Raised-panel Closet Door
Drill pilot holes for the piano hinge in the mounting edge of each purchased raised panel door. Use a self-centering bit and position the holes using the piano hinge as a template. Secure the piano hinges with screws.
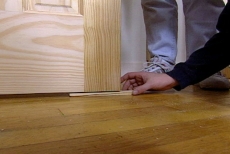
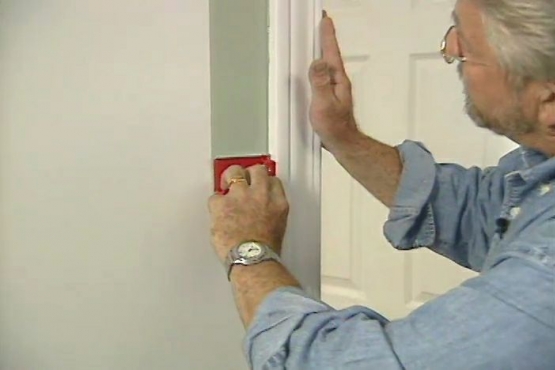
Position and Mount Each Door to the Closet Frames
Rest each door on shims to maintain correct elevation for floor clearance while mounting the door on the closet frame. Use the self-centering bit and piano hinge as a template to position holes in the frame. Secure the door with screws.
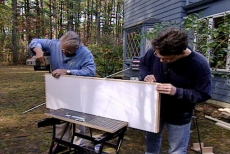
Reinforce Stock Shelves to Add More Rigidity and Support
Purchase stock vinyl-coated shelves to customize the inside of one closet. Reinforce the shelves with glued and nailed strips of narrow wooden facing to make them stiffer and give them a more finished look.
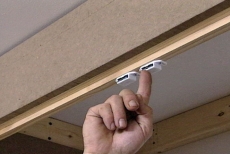
Add Doorstops and Magnetic Fasteners to Latch the Closet Doors
Add a wooden doorstop and magnetic fasteners to latch each pair of doors. Secure shelving standards to the interior side of one closet and insert metal clips to support shelves. Install brackets for clothes rods in the other closet.

Install Crown Molding, Add a Coat of Primer and Paint
Install crown molding to dress the top of the closet at the ceiling. Mask the wall intersections with painters' tape. Apply a coat of primer to all the project components and then paint with semi-gloss match surrounding trim.
Related Tips


Blog Articles

Expert Tips: How to Mount a TV on the Wall
Get step-by-step instructions on how to mount a TV on the wall, especially for big screen TVs. Master the art of wall mounting with our tips.

Frustrated by Stripped Screws? Here’s How to Get Them Out Fast
We've all been there. You're in the middle of a project, and suddenly your screwdriver spins uselessly in the screw head. The screw is stripped, and frustration sets in. With a little know-how and this simple trick, you can tackle a stripped screw and get your project back on track.

The Secret to Finishing Plywood Edges
Plywood projects are fantastic, but exposed edges can be an eyesore. This blog post unveils the magic of edge banding - a simple technique to create flawless, finished edges on your plywood projects, making them look professional and ready for paint or stain. Watch the video to learn how to apply edge banding like a pro!


