How to Lay Ceramic Tile over Plywood
Use a Patented Technique to Guarantee Success
Laying tile over a plywood subfloor can be a bit tricky, but if you take the time to prepare the sub floor properly, you can enjoy a new tile floor that will last for a lifetime. With this patented new technique, Ron's friend shows us how to build a strong base, and then prepare it using the Tavy Thin-Skin system so that the tile is as strong as it would be with any masonry installation.
You can purchase Tavy Thin-Skin Glue here
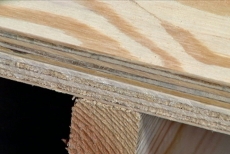
Prepare the Sub Floor
Begin by making sure that the sub floor is thick enough. The tile industry recommends a sub floor of at least 1 1/4" thick. If there is too much deflection in your sub floor, then tiles may pop loose over time. Keep in mind, when building up the thickness of your sub floor, to overlap the seams of the different layers of plywood, as this will also help stiffen the floor.
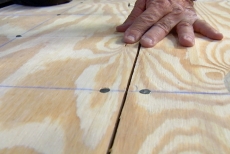
Lay out a Nailing Pattern for the Sub Floor
Make sure that the sub floor is nailed down correctly. While this step may seem a bit like over kill, it is important that the sub floor be as rigid as possible. Use a chalk line to lay out a pattern of 8" squares throughout the field where the tile will be installed, and 6" around the perimeter. Be sure that the nails are long enough to go through both pieces of plywood, and that the nail heads are set below the surface.
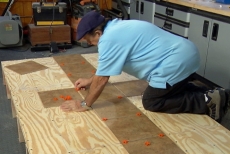
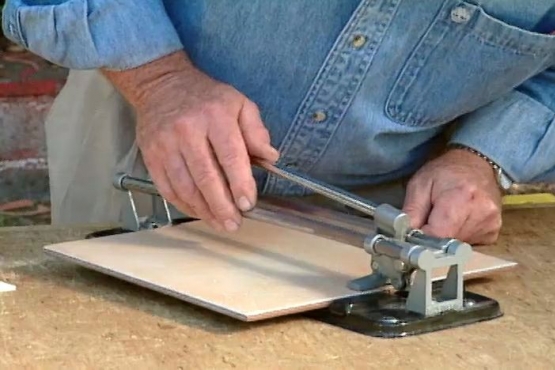
Dry Fit the Tile
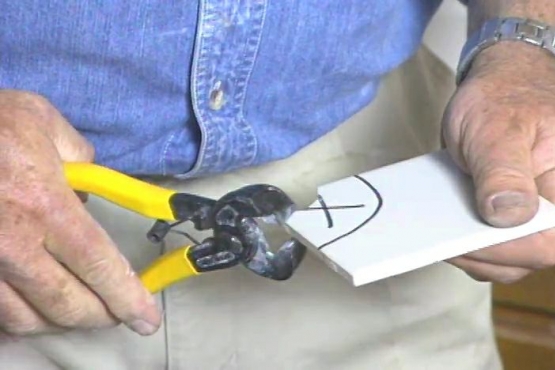
It is important that you dry fit the tile before you begin using any adhesive. Slide the dry fit tile around on the floor until you have an equal sized gap on each end of the run, ensuring that the edge pieces are uniform all the way around the room. Once you've set the tile out and imitated the grout size with spacers, go ahead and cut the edge tiles with a carbide wheeled tile cutter.
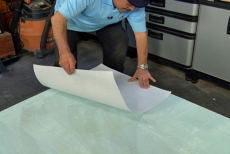
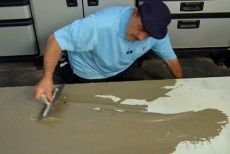
Prepare the Surface
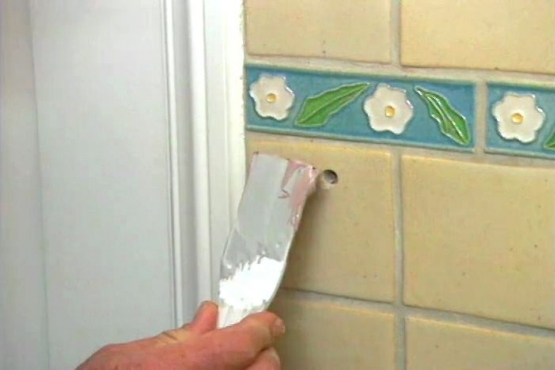
For this project, we are using the Tavy Thin Skin system to prepare the surface for tile. Begin by applying the Thin-Skin Adhesive to the plywood with a smooth trowel. Once the surface is completely covered, cover the adhesive with the fiberglass based paper and smooth out any wrinkles or bubbles with a broad drywall knife.
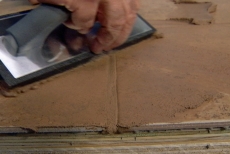
Skim Coat the Paper
As soon as the paper is down, it can be skim coated with thin set mortar. The goal of this step is to create a smooth masonry surface for you to spread the mortar on in the next step. Use a smooth trowel for this step and think of it as though you are priming a wall before painting. The goal is to condition the surface to receive the product that will actually protect and cover the floor.
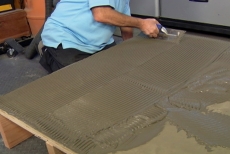
Trowel on the Mortar
Apply the mortar that the tile will set in with a 1/4" grooved trowel. As you spread the mortar, hold the trowel at a 45 degree angle, as this will ensure that the mortar is spread evenly and that there won't be any high or low spots in your floor.
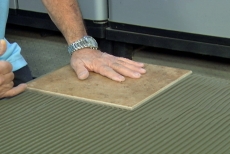
Set the Tile
Set the tile into the mortar and then carefully slide it forward and back about 1/4". This will ensure that the tile is pulling the mortar from one ridge to the other and will virtually guarantee complete mortar coverage on the back of the tile. This step also eliminate ridges between the tiles, allowing the grout that you will install later to be uniform in thickness.
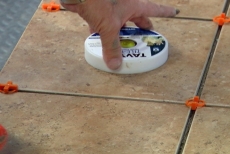
Using Spacers
Use spacers in between the tile to ensure a uniform gap between all of the tiles. This is a very important step in regards to the final appearance of the floor. For this project, we are also using a Tile Puck. This is a small tool specifically designed to float across the tile floor as you are installing. You will be able to determine if one tile is higher than another by listening for the click. Any tiles that need to be set further into the mortar can be persuaded to do so with a rubber or plastic mallet.
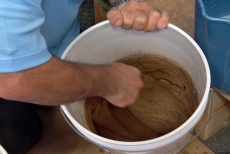
Mixing the Grout
Before adding any water, mix the dry grout well so that the dye is evenly distributed. This step will ensure a uniform color throughout. Add water and mix the grout until it reaches a creamy consistency.
Applying Grout
Using a rubber grout float, work the grout into the joints, making sure that it goes all the way to the bottom. Once the joints are filled, turn the float at a 45 degree angle and begin working across the tiles from corner to corner, removing any excess material. Keep in mind that the more excess you are able to remove during this step, the easier the final stages of clean up will be.
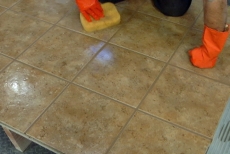
Cleaning the Face of the Tile
Allow the grout to dry until the material left on the face of the tiles becomes hazy. You can now use a clean sponge, with about 80% of the water wrung out, to clean the tiles. Use long, broad strokes, always making sure that you have a clean edge down. If, after this step, you still have a bit of haze on the tiles, use a clean dry cloth to buff the haze away, just as you would if your were polishing your car.
Related Tips
Blog Articles

Maximize Your Yield with DIY Netting for Strawberry Beds
Keep your strawberries safe from pests with our DIY strawberry cage netting solution. Learn how to create sturdy frames and find the best netting for your strawberry plants.

Change It Up: Swapping Out Your Light Switch Plates
Tired of boring light switch covers? Upgrade your home decor with this simple guide on replacing light switch plates and make a statement in every room.

Revamp Your Outdoor Space: How To Stencil A Concrete Patio
Learn how to create a stunning patterned concrete patio with our easy-to-follow instructions for stenciling. Upgrade your outdoor space in no time.


