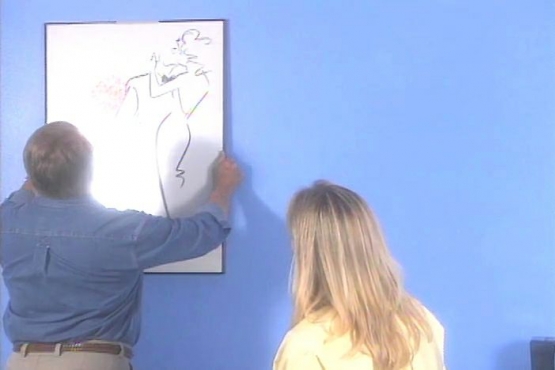
Add a personal touch to a photograph, print, or piece of art by designing and building your own picture frame. Taking the time to create your own will allow you to design a frame that fits your decor, the nature of the artwork, as well as give you the satisfaction that comes with doing it yourself.
For this project, Ron is using poplar. This hardwood is readily available at most home improvement stores, and is fairly versatile. 
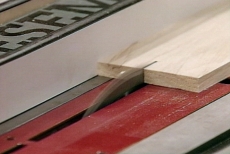
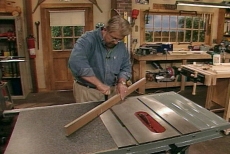
To build this frame, you will need three different thicknesses, but if you'd like a frame with a little more (or less) heft, then you can be flexible with the thickness of the wood that you choose. Obviously, a heaver frame may be more appropriate for a larger piece. Once you've selected the thickness of your stock, use a table saw to rip it to the correct width.
When building a custom frame, you can add your own unique design touches by rounding and shaping the pieces of stock that you assemble. A router and a router table are the easiest way to do this. A round-over bit will eliminate any sharp edges and give the framework a smooth, sculpted look and will help hide the transitions between the pieces.
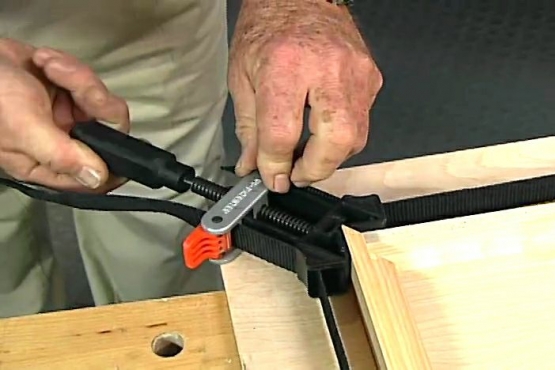
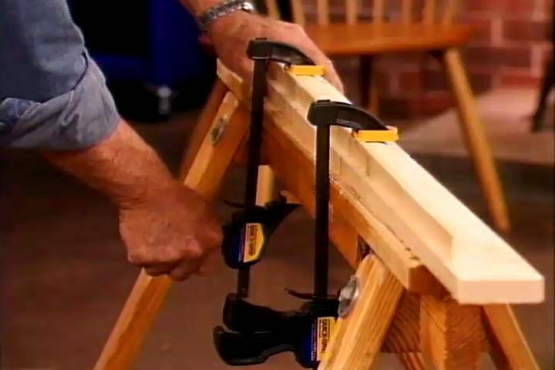
When gluing two flat pieces together, make sure that the glue is spread into a thin even layer. This will ensure that the bond is tight and will stand the test of time. Once the glue is spread over the appropriate area, apply a spring clamp every 6 inches or so. If you have to use heavier clamps, make sure you use a piece of wood between the jaws of the clamp to disperse the force, otherwise you will have marks and indentations on wood and they will show on your finished frame.
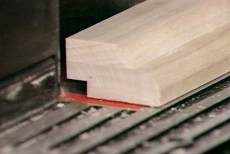
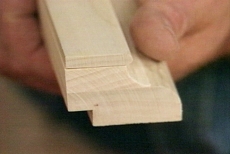
Once the glue has dried, you can use another style of router bit to remove the corner where the two pieces of wood are glued together. This will make the frame look as though it's one solid carved piece of wood. Use a cove box bit to create the smooth, round face of the frame. After you've shaped the face, change the bit again to a square router bit and cut a rabbit joint on the back side. Make it deep enough to hold the glass that will go over the front of your painting, photograph or other artwork.
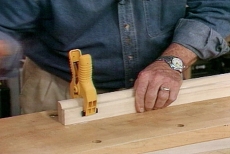
The third piece of stock that you are going to add to the picture frame stack is fairly thin compared to the two others. To ensure that you can run it through the router table safely, you'll need to construct a simple jig. The purpose of the jig is to hold keep the stock in place, without you having to place your fingers too close to the router bit. The jig can be several pieces of scrap wood that are clamped into place with spring clamps. After the 3rd piece of stock is shaped with the router, glue it into place and let it dry while clamped.
Using a table saw to cut the miters for the frame ensures accuracy and safety. Use a miter gauge to ensure that the angle is correct and uniform for all of the joints. A stop block will guarantee that all of the frame pieces are the same length. This is vital if they are going to line up correctly when you try to put them together.
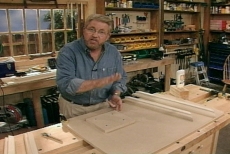
You will find that it is much easier to build a frame that is square and true if you construct a jig to help you line the pieces up correctly for gluing. Simply nail or screw a square piece of stock to the bench, and then use the square corners to make sure that your frame joints are lined up perfectly. Once you have the jig ready, apply a generous amount of glue to the corners, set them together around the jig, and then fasten them with a pin nailer.
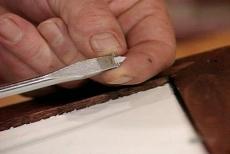
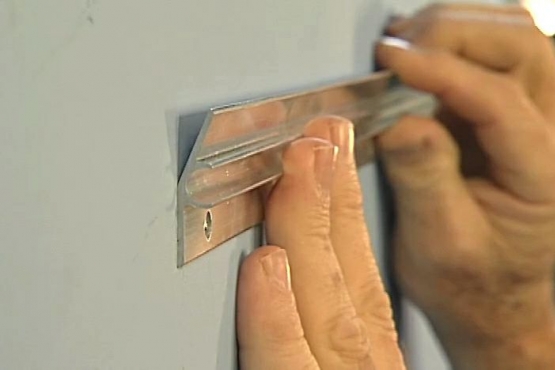
After the glue has completely set and you've had a chance to stain, paint, or finish the frame the way that you want, you are ready to put in the picture. First, set the glass into place in the rabbit that you cut on the back side of the frame. Then, you can set the matted picture into place behind the glass. Use glazier's points to hold the glass and picture in place. Once it is secure, tape craft paper over the back of the frame to help protect the picture inside.
We welcome your ideas and suggestions. Read through comments from other readers or leave your own.
Loved the video; very inspiring!!!
I like the video of making picture frame..
I’m going to try it..
I’ll let you know how it turns out..
I’ve made some all ready..
I use Oak wood.
iI bet none of you guys win the sweepstakes. come on ryobi. he he haw haw lol
I have built most everything from shelves to a barn for livestock, but have never thought of my own custom frame. My wife is always trying to frame things for our home such as the gloves that she wore for our wedding. However, she can never find the right frame. Now thanks to you guys that’s no longer an issue. Ron’s instructions made it fast and amazingly simple to build exactly what my wife had in mind. Thank you Ron!!!
I used oak trim and cut oak strips 1/4” or so thick with a relief of 1/4” for the glass and matting. I used a water proof glue (which is more resistant to changes in humidity as I live in Florida.) I bought 90 degree clamps, used a “chop” saw with masking tape to enable clean cuts for the joins. Once the pieces were cut, they were placed in the 90 degree clamps and stabilized with blocking. I then pre-drilled the holes with very small bits; then disassembled, glued, re-clamped and nailed. I have also found that since I was pre-drilling, it is not much more of a problem to dowel the joins with two dowels per corner.
Now all I need are $3Ks worth of tools a $ 250K workshop and I’m ready to make a frame that would cost me 59.00 to buy at a frame shop.
Thanks for the video! We were building a frame out of wood trim that we stained and were trying to figure out how to put the frame together easily so that it was square. I didn’t want the pieces to move when I hit them with the brad nailer. The square piece of wood on top of a base was a great idea! I hunted up some wood and made my own and now have a nice looking and square glued and nailed frame. The only thing I would suggest is to put the square wood piece within a couple of inches of the corner of the base so that your nailer (in my case a brad nailer) won’t be tipped up from level so that the nail can go in parallel to the frame. I put mine block in too far and when I was done found that two of my nails came through the back of the frame because my nailer couldn’t be held level. I’ll do it differently next time! Anyway, thanks for the great idea, it worked well!
Ron In the past I have run a frame shop and there is no way I would put a frame together using your jig. You need a 90 degree vise instead. I have seen too many times where a misdirected nail from a nail gun has gone through the side of the frame. You need the frame clamped. and you need to get your hands out of the way so you do not put a nail through a finger. Do not hold the wood with one hand and use the nail gun with the other.
Hi, Ron! I love your show! You make everything look so easy! Of course, I realize that half the battle is in having the right tools for the project. I am building a nice collection of tools, but would like your input on the most versatile and useful tools to begin. Thanks so much! Keep on inspiring those of us who love the look and luxuriousness of “real” wood.
Please send me the cut list for this project. Looks great and easy to make.
hi ron i do a lot of wood work projects i really like this one my wife has a lot of family pictures thats 5x7 who would u put them in a frame with 8 or 10 pictures in one frame with a matt on the back.
Thanks for the video.
I would love to see hints from woodworkers regarding glue cleanup. It seems to be a step that is almost always skipped on instructional videos, and yet as lots of us know it is important since glue residue can affect the way a piece accepts stain.
Top notch.. and great instructions, Sir.
Ron
You do a good job of wearing safety glasses but the recent video on making a picture frame was good. I have two comments: I always use a push rod to move work thru a router - it would make short work of a finger and second, not all fo us have a pneumatic nailer - could you show how us poor guys might do the same job w/o a nailer. Also, one question - I noticed you placed your wood glue bottle upside down on something. Could you show what that is - it looks like really easy to use.
Bob
I don’t get to see your tv show much, but i love the website and the e-mails. I’ve made a lot of pic frames, but it’s so nice to get a fresh view on new techniques and styles. Keep up the good work.
Thanks,
Mark
Millville, Pa
All well and good for relatively light weight, softwoods like poplar. Poplar and other softwoods are also very porous: allowing the adhesive to leach into the open end-grains and beyond the surface of the wood only. But, what about frames where their dimensions create weight to be addressed and what about hardwoods that are much less porous? Most adhesives don’t perform adequately, thin wood edges may be too brittle for nail fasteners applied in the manner demonstrated and the dense, non-porous hardwoods perform more like glass than like a softwood. Also, softwoods forgive miters that aren’t perfect while hardwoods do not. You can’t expect this kind of corner fastening to hold its corners snug if boards naturally try to pull away: one from another.
I’m seriously not just trying to blow holes in this demo. I have scoured the internet for many, many hours looking for a decent solution and/or effective fasteners and adhesives and have found very little indeed. I could really use some help with this.
Thank you.
Hi Ron,
Great job with the picture frame video instructions! The only think that I think you could improve on is a little longer video with a few more details.
Thanks for your great work! I love your TV show and your web site.
Thanks,
Bob
Thanks Ron, I’ve built everything from picture frames to houses in the last 35 years, and I’m always picking up a new hint or two from you, as I did with this picture frame section…..in my trade I’ve found that you can always learn something new…..that’s why I love what I do. Keep up the good work.
who ,that is not a wood craftsman, is going to spend a pocket full of money to make a picture frame that takes a bunch of clamps, router,and router table , table saw , even a shaper . so I think the idea is poor , a much better plan has got to be out there.
You never told the dimensions to cut the frame pieces. It seems as each of the three sections have different widths. Update this with that info would really help.
Hi Ron,
I have been framing for many years and was anxious to see your video. It was good, but you seem to have left out some real important phases. If you are interested in my detailed list, feel free to contact me. There are also some tricks that I use to make things easier.
I specifically wanted help in how to determine the correct measurements for the picture, taking into consideration the mitered corners, but I couldn’t find any direction on that.
Ron, you have the clearest presentation that I have ever seen. I am a disabled veteran and love to do woodworking. I have to do a little at a time and your video allows me to come back and recheck things as I progress forward.
Thanks so much, Ike
Awesome, your video and explanation of directions has got me ready to start mine. Thank you very much.
I was so pleased to find your cable program today. I have been trying to get some of the local lumber businesses to give lessons to women. I gave up. So when I saw your program today while switching channels. I immediately came to the web page and watched . I loved it! I love working with wood but didn’t know where to start. Thank you so much for you made it look so easy, and not mysterious. You were very clear on your instructions. I will be your follower, because I truly want to learn. I am excited about your program.
Thanks again,
Carol
You made a picture frame look easier then I thought.
This is 1 project I’m looking foward to do.
Thanks
Ron,
I sure like this picture frame, can I get a material list? Or if it is already on your site please tell me how to get this information. I really like you site and refer to it frequently!
Thanks so much!
Chuck
You made a great looking frame! But Im not sure how you got the exact size for what looked like a unique picture size. Keep giving out the tips that make woodworking more fun and easier.
This project will be helpful to me as I do some painting on canvas and need frames for my artwork. Thanks.
have admired your show for years, GREAT ! will start small a project….
Great video, like the way you have a jig for all occasions. I always learn an easier and smarter way of getting projects done by following your methods. Great show, great tips.
Would like to have a print button so that I can print out the instrutions without all the ads.
Enjoyed the new site and both projects . I plan to build several picture frames
soon and this will help.
Also like being able to watch projects in full screen.
Ron,
Sorry, I’ve made quite a few frames in my ‘hole-in-wall’ workshop & it is NOT as easy, I say, as you make it look as “I” always have trouble getting exact frame size b-4 putting edges together,i.e., 8.5x11 frame & 3x6.
I also use biscuits @45 degee corners to assemble & frame holder until glue dries.
Always enjoy your show & tips, especially on the road.
Best,
JimBo
Spring Twp., PA
Thanks again Ron for shareing your wisdom! I am makeing 12” trivots out of glass wall tile, so hot pots and dishes do not sit right on my Corian counter tops. I was not thrilled to buy an expensive set of squares just to make a few, so your mdf jig is a wallet saver! Love the shooting jig for thin stock for routing.
Would love to see a tour of your shop, the high walls remind me of a barn, but homey, great for big projects? Love the new web site too. When you run out of projects at your house feel free to start on mine!
I wish you lived next door! Clear and precise directions and enhanced by the new website. I have you book marked. Thanks for all the help.
Glad to see the site upgrade. It looks much better and seems to work better as well.
The making of a picture frame was quite timely for me as I was given a picture as a gift as well and need an appropriate good-looking frame for it. Thanks for the information.
I like your new site
This new site seems to move faster & smother than ever before.Thanks…...Scott
If you have a comment, question, or suggestion about this project, submit it here.
All Fields Are Required
Nice video. Very clear instructions and good looking picture frames.