How to Install a Storm Door
Learn to Install a Storm Door to Add Function, Light, and a New Look to the Front Door
Feel the summer breezes or keep winter's blasts at bay, all the while admitting light after you install a new storm door. A storm door kit with good instructions makes assembly and installation a one-day project that's easy for the average home owner. The result is a handsome storm door with a white aluminum frame and a beveled glass panel.
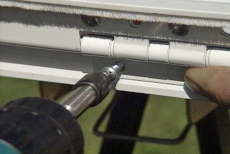
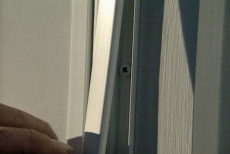
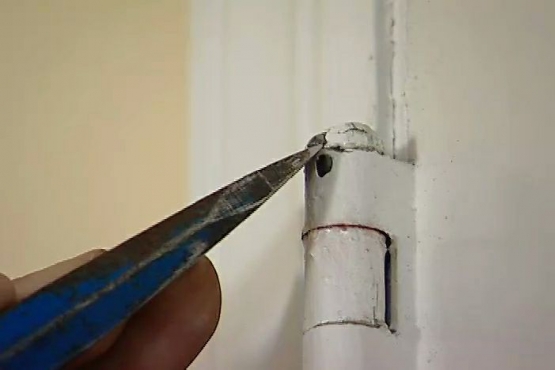
Install Storm Door Hinges Using the Manufacturer's Index Hole
Install the storm door hinges on the same side of the door frame as the existing door. Use a power drill to drive the first screw into the single index hole the manufacturer has provided to position the frame properly.
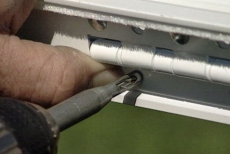
Match Hinge Holes as You Install the Storm Door
Install a self-centering drill bit to bore the remaining holes for the storm door hinges. Its retractable sleeve lets it match the hinge holes to install storm door hinges precisely. Secure the hinges with screws.

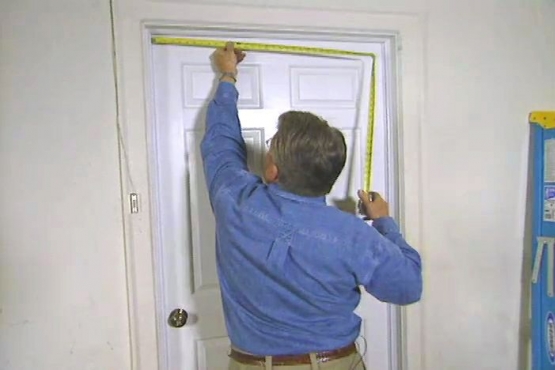
Cut the Hinge Plate to Length to Install the Storm Door
Measure the door height to determine the length of the hinge plate. Mark the measurement on the hinge plate on the door and cut off the extra length with a hack saw before proceeding to install a storm door.
Position and Install the Storm Door without Glass or Screen
Remove the glass and screen. Stand the storm door upright in the doorway with hinges on the left. Both hands and feet help to install a storm door! Secure the recessed track/channel to the door frame with screws.

Secure the Hinges to Install the Storm Door
Drill pilot holes through the hinges with the self-centering bit. Drive flat-head screws into the jamb through the hinges to install a storm door securely. Snug the screws, but avoid over-tightening them and distorting the hinges.
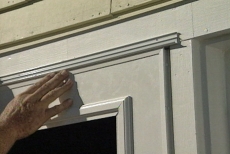
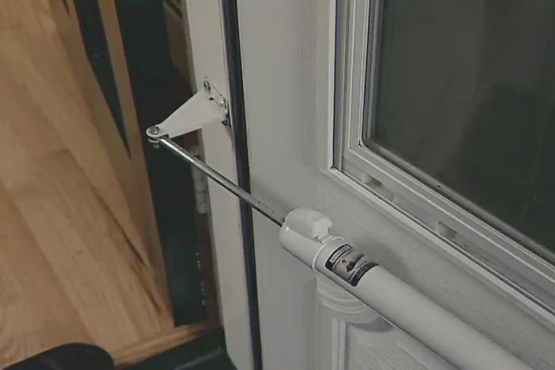
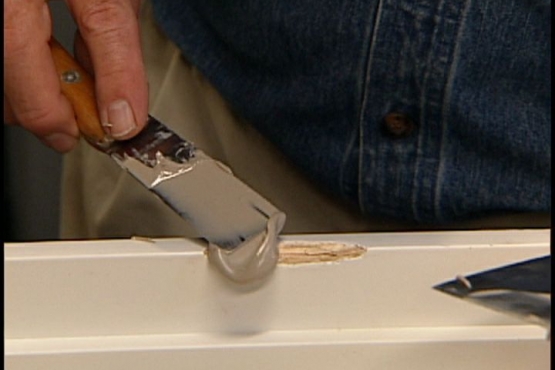
Caulk the Drip Cap as You Install the Storm Door
Caulk the back side of the drip cap and slide it over the top of the door to center position. Drive in screws to secure it as an important water-proofing part of the project to install a storm door.
Conceal the Screws as You Install a Storm Door
Secure the molding to the door frame. Snap the metal trim over the tracks/channels to conceal the screws as you work to install a storm door. Work all the way around the door frame's perimeter.
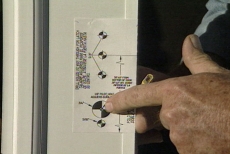
Make Holes for the Hardware in the Storm Door Kit
Mark holes for the hardware to install a storm door kit. Use a spring-loaded punch to start the holes. Bore with a power drill and small bit, but switch to a larger bit to complete the latch set holes.
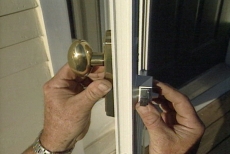
Secure the Latch to Install a Storm Door
Attach the knob and latch mechanism to both sides of the door with screws and a hand-held screwdriver. Open and close the door, latching and unlatching it as the real test of success when you install a storm door.
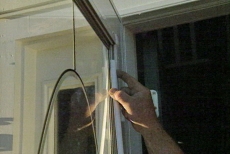
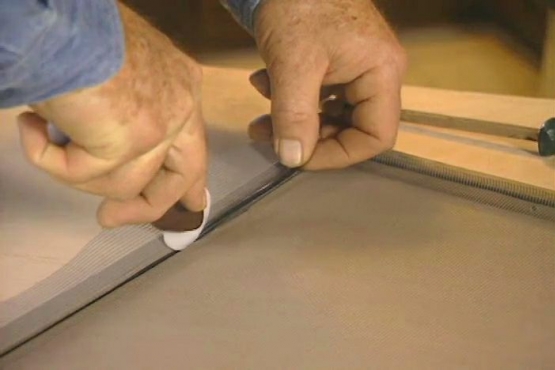
Add the Glass to Install a Storm Door
Insert the glass panel. Secure it with manufacturer's taper strips, squeezing the sides of each pre-cut strip together to insert it at the edge of the glass. You've completed your project to install a storm door.
Related Tips
Blog Articles

Maximize Your Yield with DIY Netting for Strawberry Beds
Keep your strawberries safe from pests with our DIY strawberry cage netting solution. Learn how to create sturdy frames and find the best netting for your strawberry plants.

Change It Up: Swapping Out Your Light Switch Plates
Tired of boring light switch covers? Upgrade your home decor with this simple guide on replacing light switch plates and make a statement in every room.

Revamp Your Outdoor Space: How To Stencil A Concrete Patio
Learn how to create a stunning patterned concrete patio with our easy-to-follow instructions for stenciling. Upgrade your outdoor space in no time.


